*First Look. Brand New Topaz Texture Effects on sale w/ @topazlabs

P1000919 (1)

Topaz continues to provide fun, intuitive and effective plugins with their most recent release, Topaz Texture Effects.  On sale via Topaz Labs website HERE for 30% off (normally $69.99, on sale through November 20th for $49.99 when you use code “TEXTUREFX” at checkout), as is often Topaz’ MO for new releases.  Come on in to read my thoughts, and to see more…

Continue reading

*From the hip. A retouch tutorial, using @alienskin Exposure, October 2015 with Billyburg.

final (1)

Hi all!  Welcome to a new, recurring feature on the blog here.  I’m partnering with Alien Skin software to work through the processing of images using their Exposure software.  Alien Skin Exposure is one of the most complete software processing solutions that I use, and I just love it.  With each new release, the functionality and depth become greater and more streamlined.  Exposure X is in its final beta, and should be ready to go very soon.  You can download a free trial of Exposure HERE if you’d like, and follow along with one of your own images as we explore what Exposure has to offer, together.  (if you’re looking for a discount code, you can get 10% off any Alien Skin software using the code “tysonrobichaud” so have at it).

Using images submitted by readers, I will retouch, process and in general, just have fun playing around with them as I might one of my own images, sharing my process step by step along the way.  I’ll be using Exposure X today (which may look a little different compared to the screenshots below, when finalized) to process a submitted image from my friend, Billyburg (see more from him on flickr here).  

Without further ado…

Continue reading

*A quick color balancing tutorial vid using Exposure, with @alienskin

Hello everyone.  If you have ever been plagued by color casting or color temperature imbalance, here is a quick and easy way to neutralize color shift in an image.  I shoot a lot of product shots, and often do so with congruous backgrounds.  In these cases, I’ll often use different lights to get everything lit just the way I want it.  This often brings in some issues when wanting to balance that color in post.  Using Alien Skin Exposure (click here to give it a free trial and follow along), by converting a layer to a fairly flat, black and white image, I can control the shift in color while bringing back color where I want it to be.  As opposed to trying to reiterate the video, just give it a watch, and c’mon in for a few example before and afters…

Continue reading

*Wrap your subject in light, a 4 light, high key setup.


P1210510 (1)

I’ve been working through some lens reviews, and wanted to take a break from the technical, to share a lighting setup.  Portraiture wise, I tend to normally go in one of two directions, either very minimal, directional, moody light, or a sh*t ton of lights.  This setup is the latter.  Using 4 lights and a reflector, my goal for shooting with Trisha was to wrap her in light from every direction.  I knew I wanted to really showcase her beautiful blue eyes, and getting enough light into them meant lighting her from the front high and low. C’mon in for the setup.

Continue reading

*Freebie Photography 101, the Exposure Trifecta Part 3 : ISO

exposure trifecta iso

Rounding out our Exposure Trifecta is our ISO.  We discussed Aperture here, Shutter Speed here and with ISO we finalize this three pronged, exposure equation.

Understanding when and how to manipulate your exposure might be a little tricky to fathom at first, but I’m hoping that after this series, you’ll have a very good grasp on how these three factors can be used to capture an image in any situation.

We’ll look not only at ISO specifically, but we’ll tie in all three and explain how, why and when to adjust them in concert to achieve proper exposure.  C’mon in…

Continue reading

*I thought my way was easy… Hair Masking made ridiculously simple, and remarkably effective.

topaz remark does it again!

I get a lot of email trying to promote, or sell me stuff daily.  Deals on this, or sales on that.  Discounts on memory cards, or steep cuts on camera kit prices.  Normally, I quickly scan them and toss them as my time and energy is pretty minimal these days.

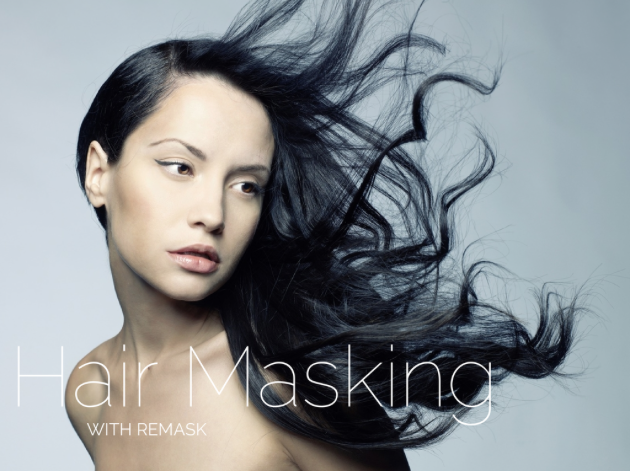
As any readers will know, my enjoyment of the Topaz plugins run deep, and although I only started to use ReMask last year, it has been a revelation for me, especially when it comes to meticulous selection tasks, like hair.

Imagine my surprise when up pops an even simpler hair masking tutorial from our friends at Topaz Labs showing that you can turn a task that without ReMask has taken me up to an hour or more into an even more remarkably time saving step of about 3-5 minutes at the most.

Seriously.  If you use photoshop, and you ever have had to select something like hair, you’ll know how tedious it can be even with the best techniques in Photoshop.

Oh yeah, and on top of this killer tutorial, they’re offering ReMask for 20% off (click HERE to download the free trial, or buy ReMask on Sale using code: “hairmask20”)!!!  It’s a little, unofficial sale that I didn’t see coming.

Continue reading

*How to shoot HDR Composite imagery with people

indbeautyhdr

Sure, we’ve all seen the images that have been run through an HDR-like tonemapping, contrast increasing filter, making the grungy, saturated and contrasty images we’ve all come to accept as HDR, or at least, HDR-like shots.  While the “HDR” look can bring about photographic debates bordering on political or religious polarity, there is a way to actually capture and process the actual dynamic range of a scene, not just try and make it look like a processed, HDR image.  If you’re not a fan of HDR, by all means, feel free to ignore this post, but to and for me HDR can be a very useful tool, and one that, in this particular situation can help stretch a limited budget by being able to get a good range of exposure for a dynamically diverse scene without tons of lighting.  Now, the trick here when wanting to do this with human subjects is that you’re needing to take multiple frames at differing exposure values, which means, in short, a person or people would need to stay statue still to make it work, right?  Not so.  C’mon in and I’ll show you how to get around this unfortunate challenge…

Continue reading

*Moving upward and onward!

backyard shenanigans

don’t worry, there were no kids harmed during the photoshopping of this image.

Hello everyone!  You may have noticed that I’m quietly adding content to the site.  This is being done to try and make a more complete resource for those visiting the site to reference specific tutorial articles or find gear reviews, etc.  The biggest changes are the new “Tutorial” “Review” and “MyGear” pages up at the top of the page.  I will be trying to catalog the more popular tutorials and reviews for easy reference, and the new gear page has allowed me to link certain cameras, lenses and miscellaneous gear that I use to my affiliate links at B&H.  Yup, you read that right.  I’ve finally succumbed to the monetary necessity of trying to make a little coin to keep the site going.  Read on for my reasoning and ever cheesy gratitude…

Continue reading

*Photovision 2012 discount, it’s that time of year again!


Hello everyone.  If you’ve followed me over the last couple years, you may have seen me post about Photovision, an instructional series that aims to help all photographers with insight into shooting, setting up a business, marketing and technique as well as offers discounts for many photographic goods and services.


I’ve subscribed for the last 3 years and have continued to glean tons of great information and would highly recommend anyone interested in getting a detailed behind the scenes look at many working professional photographers to do so as well.


This is my link which enables a substantial discount ($49 for six DVDs, normally $199, or access to instant content for a monthly price) and with signups enters me in a drawing, so if you do plan to subscribe, any subscriptions done through my link would be greatly appreciated 🙂

USE THE CODE “PVFAN” to gain the 75% discount via this link:


http://www.photovisionvideo.com?afid=65508


Thanks and happy shooting,


Tyson

*Kevin Kubota’s Lighting Notebook, along for the ride.

There are a few seemingly predictable benchmarks that photographers reach during their personal photographic journeys. After grasping exposure basics we may gravitate toward gear to replicate a particular style which may then be further embellished when we discover bokeh, selective focus, light painting, or start to really understand aspects of a post processing workflow enabling us to literally develop our own look, or replicate popular or interesting “looks” from our fellow photographers. Inevitably, at some point, photographers start to contemplate integrating added light or modifying and controlling existing light in their compositions. Wether that be for portraiture, action, event, product photography, et al, understanding the use of added light or manipulation and control of existing light is a huge tool available to those who choose to use it. Mr Kubota, popular for his seamless, post production streamlining photoshop actions has invited us into his mind with his recent book “Kevin Kubota’s Lighting Notebook, 101 Lighting Styles and Setups for Digital Photographers” C’mon in for a closer look and a few thoughts as I try to play the role of book reviewer 🙂

UPDATE!!! – The companion App is now out.  More than a companion per se, I’d say it’s a great way to get this book, it’s content and diagrams on your tablet.  You can view both the book and app, as well as purchase them directly through Kubota Imaging Tools HERE.

Continue reading