Bokeh (/bō’kɛ/): In photographic terms, has grown to mean the subjective quality of the out of focus areas in a photograph, and how a particular lens renders out of focus points of light (adopted from the Japanese term boke 暈け, meaning fuzzy, disoriented, et al). Pronounced BO (as the bo in bone) and KE (as the ke in ken) if we are taking it directly from the Japanese word, while the “h” was added to help non Japanese speaking photographers pronounce this adopted term (see the wikipedia article for the history on the term and idea in photographic application). While the definition, pronunciation and it’s subjective nuances are often debated as to it’s application in the photographic realm, it hasn’t stopped Alien Skin from creating a plugin that beautifully applies an out of focus blur to selected areas of an otherwise focused image. With their second release, Bokeh 2 has added new bells and whistles as well as a more refined control of both radial and planar regions within an image and it’s area of focus. Read on for examples and why I think this is a wonderful deal of a plugin.
Category Archives: Software tutorials / reviews
*Presets! Less talk, more rock! Or, one easy way to streamline your workflow.

Presets, a key to streamlining your workflow. (*using a New York Times Mag Aperture3 preset by Zurli) - image ©tyson robichaud photography2010
Alright alright now. No matter what your stance is on post processing, love it, hate it, meh, one thing that is hard to deny is that for the average photographer, digital photography requires a bit more time than shooting film on an image by image basis. Yes, our feedback with digital is instantaneous, yes we are able to immediately adjust on the fly but one thing that has crept into the equation is the amount of time needed after shooting to upload, catalog, tag, process and archive all of your images (not to mention, many of us tend to take quite a few more images per outing now that we get more than 24 exposures a round). One helpful tool is the use of presets, or actions. These are a series of repeatable adjustments and instructions applied to your digital file so that you don’t have to manually adjust each and every one individually. Read on for links, examples and tons of freebies for APERTURE, LIGHTROOM and PHOTOSHOP presets and actions…
*Exposure 3, third time’s a charm!

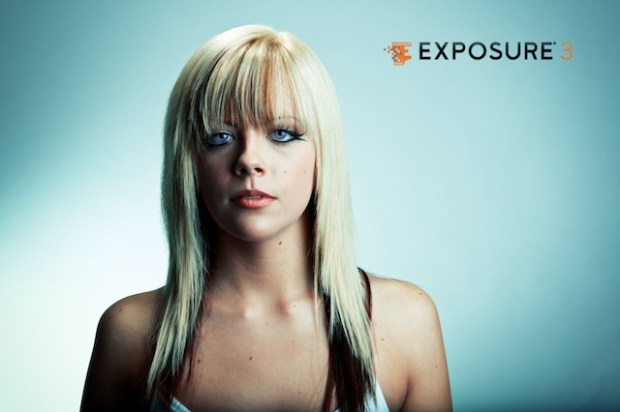
Alien Skin's Exposure 3 makes your digital files instantly feel film like. - ©tyson robichaud photography 2010
I have been curious about the Alien Skin Exposure software plugin for Photoshop for a long time. With the third iteration, Exposure3 has taken their film simulation software even further. Read on for examples and reviews…
*Authors note: Link to Alien Skin’s Newsletter showing this article here!
To those who’ve come from the newsletter, welcome!!!
(March 2012) Now that Exposure 4 has been released, you can read my updated review HERE!
*Selective Color use in Black and White Photography
One fun, and very easy technique in Photoshop is to use a small point (or points) of color in a black and white image to draw focus to a particular area or provide a particular mood. It is easy and can provide a bit of intrigue to an image. This is my basic way of achieving this using an image in Photoshop.
*Free Photoshop Contrast Pop Action!
Here is a brief tutorial on how to add a contrasty “look” to just about any picture. There are sites out there to purchase many of these types of actions, and some of them are well worth the price, but I’ve found that through my years, many other photographers have offered up free advice as I was learning to scrape the surface of Photoshop, which enabled me to gain a deeper understanding of my post processing. So, in this tradition, I shall try to pay back a bit of that help by offering up this little trick. I know that many photographers would rather spend their free time taking pictures, not in front of a computer processing them. I myself find enjoyment on both sides of this coin, but I sure don’t mind being able to quickly automate some of my more “used” techniques. This is one of them…
*The 5 minute Greenberg Treatment.
For those who do not know, Jill Greenberg is a famous photographer to the stars. Some of her work has received, uh, criticism, for her use of light or tactics to achieve certain reactions with, or effects on her subjects (see the crying babies in her ‘End Times‘ series, or the now famous John McCain shoot). I call it art, but I do fall on the crass, perhaps cynical side of the human spectrum. Regardless of your personal feelings toward her, the lighting she uses is dramatic. Her style has been duplicated by many a strobist and comes about by a pretty easy to replicate setup. Now, to do it well, is a bit trickier but we gotta start somewhere right? Read on for a quick light set-up and easy to follow post processing technique. Continue reading
*Floating in Photoshop! How to levitate in a photo.
*Wanted to thank everyone who has stopped by to read this post over the last few years. I’ve received quite a few emails and seen links back to this article from many different forums based in many different countries. Thank you! As originally mentioned in the tutorial below, this isn’t a particularly original tactic, but if you put your own spin on it, it can produce some really cool imagery. Okay, on to my original posting, and thank you again for everyone who has stopped by. I’ve been really excited to converse, learn and meet with many of you since I started this blog over three years ago!
Enjoy,
Tyson
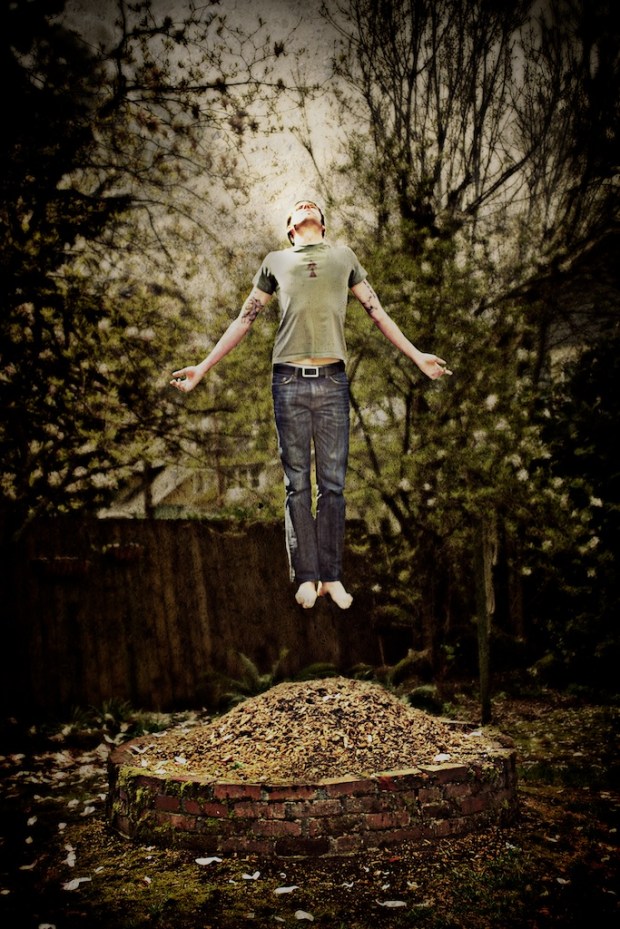
This is not an original idea, but so few ideas are anymore. While it may be a well used tactic, it can be very effective. I’ve played around with this technique a few times and it is one that when done decently will almost always get a “wow!” or at least a “huh, wait, what?” It is easy to do as well. It requires Photoshop, or if you are fundamentally against paying $600 for software you can download GIMP. I’ve used Photoshop for this one, so if using GIMP, you will need to translate these steps into GIMP-speak which shouldn’t be too hard.
Okay, our goal is to appear to be floating, or hovering so unless you’re an accomplished zen levitation master, you will need to take two pictures to create the illusion.
*High Dynamic Range with Photomatix
Are you ever frustrated by scenes that are too dynamically diverse having to lose your highlight and shadow info to expose for the midtone ultimately losing the shadows to dark noisy areas and blowing out your highlights resulting in detail-less white blotches? I think that I can help. This isn’t the only HDR or Photomatix tutorial on the web, but you’re here, and it’s free. Regardless of how you feel about some of the HDR imagery that can bombard the senses, combined with the proper capture technique HDR software can help achieve, photographically ,the dynamic range that the human eye is capable of seeing. By using this method of combining bracketed exposures, you can save yourself hours of dodging and burning, masking and aligning in Photoshop, with simple HDR software, or you can create your own fantasy cartoonish grunge-scape if that’s what you’re after. I will walk you through step by step instructions regarding the proper capture and postprocessing techniques using the popular HDR software, Photomatix from HDRsoft. I also have a discount code to offer you 15% off (TRP15) if you choose to purchase the software. To follow along, Photomatix is available as a non-expiring full free download (it will just watermark your images) to use and feel out the benefits to this very popular tool in digital photography. Read on for links, techniques and a software discount…


