Here is a brief tutorial on how to add a contrasty “look” to just about any picture. There are sites out there to purchase many of these types of actions, and some of them are well worth the price, but I’ve found that through my years, many other photographers have offered up free advice as I was learning to scrape the surface of Photoshop, which enabled me to gain a deeper understanding of my post processing. So, in this tradition, I shall try to pay back a bit of that help by offering up this little trick. I know that many photographers would rather spend their free time taking pictures, not in front of a computer processing them. I myself find enjoyment on both sides of this coin, but I sure don’t mind being able to quickly automate some of my more “used” techniques. This is one of them…
The idea behind this post started when a fellow GF-1er had mentioned a photoshop action that they had purchased which appeared to do something similar to an action that I had recorded for myself and used on a fairly regular basis to boost contrast while sharpening. Mine looked a little different, so there began the exploration. I was kind of stumped, I kept hitting dead ends, so I did some searching around on local and global contrast. As luck would have it, another photographer had commented on one of my blog posts and I got around to checking out his blog (as I often like to do with anyone who posts their link when commenting) and while there was one aspect of the effect that I couldn’t quite nail down, I saw this! George, the author of that blog, shows how to punch up your local contrast using the unsharp mask filter. It is quick, and if turned into an action of its own, can help by boosting the contrast on most all photos with one click of your action play button. I’d never thought to use the unsharp mask that way! Thank you to George for your insight and generosity in openly sharing through your site. Stop over at his blog (www.phototouchup.net) and give him a shout. The paid action in question had gone further though and sharpened along with adding contrast both locally and globally, so we are going to build on George’s approach and get really sharp and contrasty up in here. Now, as opposed to having you just download my action, I figure I will just walk you through it so that you can record it, and change it up if you so choose. Teach someone to fish, ya know? Or, if you’re in a rush you can download this action for free HERE. (take the 30 seconds to input an email address and password for presetpond to get all the free downloads you can handle)
Okay, let’s start by recording an action. You will need photoshop (a semi current version CS1 or later I believe), or any version of photoshop elements capable of recording actions for this. If you’ve not recorded an action before, it is really easy, and a great way to help automate tasks that you tend to do repeatedly.
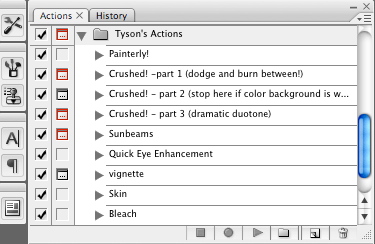
With your image open in Photoshop, make sure your Actions palate is selected, like so:
To record an action, we need to start by pressing the create new action icon (next to the trash can). Once you’ve named your action and told it where to live (actions need to live in “sets” which are just folders, so name your set or assign this action to a set and hit record *see step one below), it will begin recording your every mouse click. Try to think of this action as a general application that can be applied to many photos, and not just the photo you are working on while recording. What may work for one image may need to be adjusted for another, etc. Cloning, selections and the like should be left out of this particular action (and most actions in general) and dealt with on a picture by picture basis. That said, don’t worry if your picture looks crazy after applying these settings. I will explain how to modify these by way of layer opacity after the action has been applied. We will now record our Contrast Pop action… Ready?
1. Press the “Create New Action” icon, name that bad boy, assign it a set and press record.
2. We are going to start by using George’s Unsharp trick. Copy your background layer (easiest way is to click on it and drag it over the “create new layer” icon at the bottom of your layers palate which is the icon next to the trash that looks like a piece of paper with a folded up corner). With the background copy layer selected, go to Filter>Sharpen>Unsharp Mask and input George’s numbers: Amount – 20%, Radius – 50 and Threshold – 0 You should see an instant change. Because we duplicated the background layer, we can easily change the opacity to suit our needs for each different picture. Hold off on doing that for the time being, as you want to keep these settings at your ground zero for the sake of the action.
3. Copy the “Background Copy” layer (you can again just drag the ‘background copy’ layer over the create new layer icon). We are going to apply a combo smart sharpen and high pass filter to the background copy 2 layer. With the background copy 2 layer selected, go to Filter>Sharpen>Smart Sharpen and input these numbers: Amount – 100%, Radius – 1 pixel, Angle – 0 and click OK. Not clicking anything else, go to Filter>Other>High Pass and input: Radius – 50 pixels. I know that this is much more than the traditional high pass sharpening setting, and may look like some HDR haloed nightmare scene, but it will aid us in creating the substantial contrast that helps make up this look, and don’t worry, we’re going to adjust the blend mode. With the background copy 2 layer still selected, click on the drop down box next to the Opacity slider (it should say “Normal”) and select “Overlay” as your blend mode. See, not quite so bad.
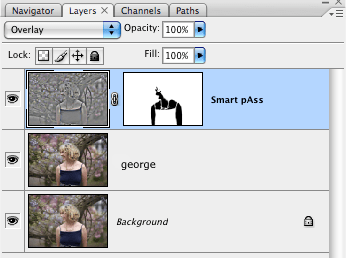
4. Now, to be a good PS’er, we should rename our layers so that down the road after we’ve forgotten we even had this action around, we will remember what each of the layers was there for and in turn, easier to adjust the opacity of each one knowing what we’re adjusting. Double click on the layer name “Background copy” and rename it whatever you’d like. I will name mine George (I will hug him, and love him,…). Next, rename the “Background copy 2” layer, I will name this one Smart pAss. (the fun part about having your own blog, is you get to do just about whatever you want…) Now just click Return (Enter on a PC) to finalize your second copied layer’s name.
5. Click the stop button at the bottom of the Actions Palate (the square next to the red record button) and VIOLA! You have finished recording your action.
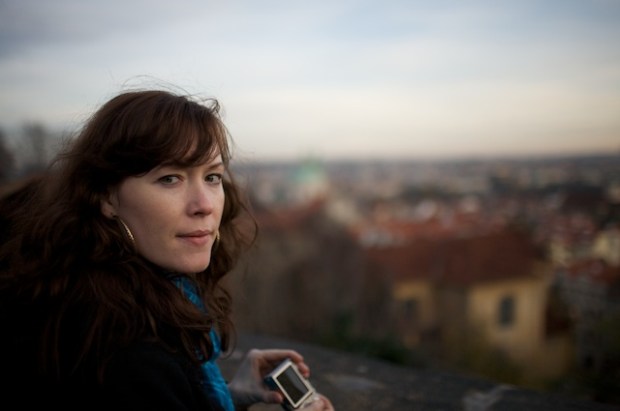
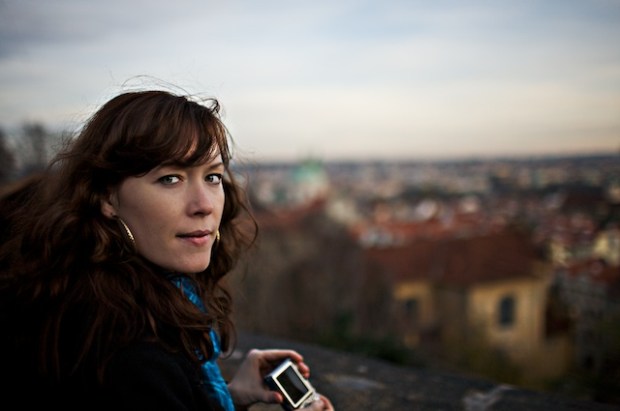
Now, each image may need a little adjustment, but all you need to do to apply these same base settings to any image is highlight your action and press the play button (the triangular button that looks like it would mean play at the bottom of the actions palate) and it will apply these same layers to whichever image you have open in Photoshop. By keeping each of these adjustments on their own layer, we can simply adjust the opacity of each to get the final image where we want it. Another thing to keep in mind with this combination of local, and global sharpening is, with the gratuitous highpass filter, it can produce unsightly halos, really deepen shadows and when combined with over sharpening, can be unflattering, to skin especially. If you don’t believe me, just run this action over a picture of your significant other or spouse and see how they feel about it. Depending on your partner’s demeanor (I won’t say gender as I know plenty of guys who are self conscious about their portraits too), you may have responses like those I’ve gotten which have been anywhere from “THROW THEM ALL AWAY NOW” and, well I don’t know, she didn’t talk to me for a couple days. Easy answer: add a layer mask and paint the adjustment out of the areas that you want to remove the contrast from (I’ll give you a hint again, the skin for those you would like to remain on good terms with). I masked out the Smart pAss filter by adding a layer mask and painting with a soft brush over Kira’s skin in the image above. Here’s how my layers palate ended up looking, resulting in the “after” image above:
That’s about the size of it. Hopefully this is helpful and brings a little pop to your photography.
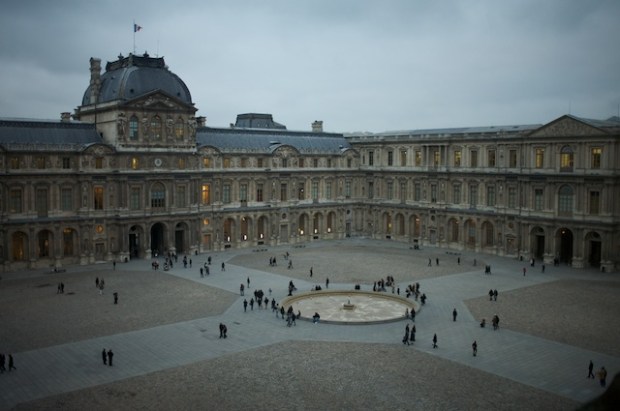
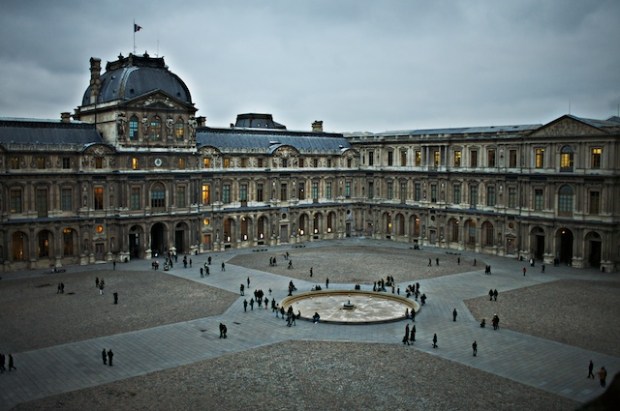
Here are some of my before and after images using the newly created action:
Before:
After:
Before:
After:
Before:
After:
Before:
After:
You certainly should watch out for the halos that can be created in situations of high contrast if that is a look that bothers you (I’m not a huge fan myself). It’s pretty easy to deal with them though if you want. You can decrease the opacity of the Smart pAss layer, or mask that layer and paint the halos out. I think that this ended up close to what I was trying for based on the discussion at gf-one.com that started this whole adventure, so hopefully this will save a few of us some money… 🙂 This type of treatment isn’t for every picture perhaps, but it can help create a little drama and depth in an otherwise flat shot. At first glance, knowing what heavily applied high pass can do to skin, this doesn’t seem to make a whole lot of sense for traditional portraiture, but I have had great luck using similar tactics when I was able to selectively apply it by masking out the effect on skin and other features that weren’t exactly ‘flattered’ by this type of modification. It’s only a foundation from which to build your masterpiece. Enjoy and if you feel like sharing, I’d love to see your results in our flickr group pool.
Happy shooting everyone.




Hi Tyson, first up, I have just purchased a GF1 and I am essentially a point and shoot man. The GF1 is the beginning of new journey for me, and I start beginners photography course next week. I chanced upon you on the GF1 forum and was impressed with your knowledge, your generosity, and your fantastic photography. You and Reeray both. I have also come to enjoy your blog, I could go on but I won’t… Tyson, my question is – as a newbie – can I apply the same Contrast process in Aperture 3? And if so how? I’m simply blown away but the results – just awesome!
All the best, keep up the great work. Its easy to see from al the responses you have reached a large audience. Thanks again.
Matiu (NZ)
LikeLike
Hi Matiu,
Thank you for finding me and taking the time to comment. Firstly congrats on the new camera! It is one of the most enjoyable digital cameras I have ever owned, I’m sure you will enjoy it. I think a beginners course is a great way to get acquainted, I’d also suggest to sit down with the camera and read through the manual. Get familiar with it so that you have an idea where some of the settings live. Another suggestion to help supplement the course, have a look at Bryan Peterson’s “Understanding Exposure.” It is a wonderful book to help any level of photographer walk through or brush up on the foundation of photography in very easy to follow prose. He also provides great visual aides.
As for applying contrast in Aperture, there is no direct translation but I’m sure you can add a curves adjustment and increase the global contrast slider (contrast). Once you get deeper into digital, I might suggest looking to supplement Aperture with an editor like GIMP (free photoshop like application) or even Photoshop elements which is an affordable alternative to the full PS. As is, Aperture has come a long way for adjusting, tweaking and processing, but it is not a direct replacement for a heavy editing program like PS. Check in with some of the Aperture flickr groups and search for “presets” which may turn up some tricks to get similar results and if I can figure out a good one, I will comment back here with it.
Thanks again!
Cheers,
Tyson
LikeLike
Hi Tyson,
Thank you for the secret setting on PS Contrast Pop Action. It works very well and most importantly, it saves editing time in PS.
I also included a short cut function key in the initial pop up palette after naming the action. So, whenever a photo is opened for editing, I just tap on the short cut key and the two programmed layers will load.
LikeLike
Absolutely SHLEW. I hope it continues to help and I’m very happy to hear that you are getting some use out of it. Nicely done taking it a step further in the automation too. I will need to keep that in mind for the next PS tutorial.
All the best,
tyson
LikeLike
Hi Tyson, thanks for the feedback. I’ll be looking for the Peterson book, sounds like a great way to reinforce the course lessons. So, it sounds as if PS Elements may be the way to go for now. But that begs the question, what’s the main differences between say PS Elements 8 and Lightroom 3? Which way would you lean…?
LikeLike
Hi Matiu,
Between PSE8 and LR3, I would go with PS elements seeing that you already use Aperture 3. Aperture and Lightroom serve a very similar purpose and are geared primarily as a DAM (digital asset management) software meaning they catalogue, tag, store and sort your images. Both are good programs and either has its pros and cons compared to the other. They’ve also both become more and more geared toward being a non destructive adjustment software as well, but are limited compared to Photoshop or Elements. They both are really cool and capable of some great image adjustment, but in contrast PS Elements is primarily a photo editing software and not a DAM. It does what Ap3 or LR2 cannot do in the way of adjustment layers and just sheer depth to the program. From Aperture, if you were to acquire PSE8, after installing, you can go to Aperture>Preferences and choose PSE as your “external editor.” I use PS in this way. From Aperture, you just need to hold Shift+Command+O and it will open a version of the image in PSE and when saved, it will save it back in Aperture. The real key here, is it is non-destructive. This is the biggest boon to a DAM like Aperture or Lightroom. They leave your original file untouched and create a referenced copy. Not only that, but it is merely a file of “instructions” and not a whole file so for instance, a 10MB image file doesn’t have to be duplicated to “non destructively” edit and live as a whole other file on your hard drive, but merely a ‘referenced’ copy file which is much much smaller. Cool stuff.
Good luck with it.
t
LikeLike
Hi Tyson!
You have done an amazing job with this tutorial about automating the process of improving photos. I like the idea of combining Unsharp mask with High pass filter which I have to admit I don’t use much.
Building on my easy trick to improve every photo and creating this action is really well done! I am really happy you saw value in my blog http://www.phototouchup.net .
LikeLike
Thanks George! I’m really appreciative of your help. I look forward to crossing paths in the future. Hopefully we can continue to bounce ideas off of each other.
Cheers,
Tyson
LikeLike
If only I had a quarter for every time I came here! Amazing article.
LikeLike
Thanks Zachery.
Greatly appreciated. I hope I can continue to provide helpful material.
Cheers,
tyson
LikeLike
hey was just browsing and saw this. great article, thanks tyron. good work!
LikeLike
Thanks for stopping by Paul!
I’m happy to do it.
cheers,
tyson
LikeLike
Pingback: *Presets! Less talk, more rock! Or, one easy way to streamline your workflow. «
Pingback: *The Eyes Have It. «
I real like simple, easy and effective post-processing Actions like this. Thanks for sharing.
LikeLike
Pingback: *Adding an ‘aged’ feel to your photographs. «
Pingback: *Floating in Photoshop! «
Pingback: *Kubota Lensbaby Action Pak! «
Pingback: *Free Bleach Bypass photoshop action. «
Hi Tyson
I’m very much impressed with your article “Photoshop Contrast Pop Action” and that you mentioned it as a free action. Since I’m new to the photography world of using photoshop actions, I would like to know how I can download this action, as there is no download icon on your page.
Thanks !
Simon ZA
LikeLike
Hi Simon,
Thank you! I intentionally didn’t post the action to try and walk those through who’ve not recorded actions before, but you can download it directly from presetpond.com here: http://presetpond.com/presets/photoshop_actions/contrast-pop/
You’d have to create a quick profile on presetpond if you haven’t already, but it is free, and very well worth it in my opinion. If you use Aperture or Lightroom, there are tons of free presets along with quite a few for photoshop and silver efex pro, etc.
Hope this helps!
Cheers,
Tyson
LikeLike
Pingback: LOOKING TO THE EYES
Pingback: *WILL WORK FOR FUN! Your questions about life, love and photography, answered. «
Pingback: *A quick, simple and free Vignette Action «
Pingback: *Everything you need to know about digital photography. Two years of tips, tricks and various freebies, revisited. «