

Halloween is upon us. We’re only a week away from discounted bags of little candies and the beginnings of Christmas decorations adorning every retail outlet. With Topaz currently offering their cool photo enhancement plugin Topaz Clarity at 25% off until this Friday Oct 31st (Click HERE and use code “octclarity”), I thought it would be fun to use it as part of a little tutorial. Last year, when Topaz ReMask went on sale, I used my jack o’lantern as my muse and replaced my head with it. After fielding inquiries about my penchant for replacing my head with pumpkins, cameras and various other objects over the last couple years, I thought I’d take the opportunity to show you how easy it is, while creating a fun family portrait in the meantime. I’ve set up links to download free trials of all the plugins used if you’d like to try it yourself. Come on in…
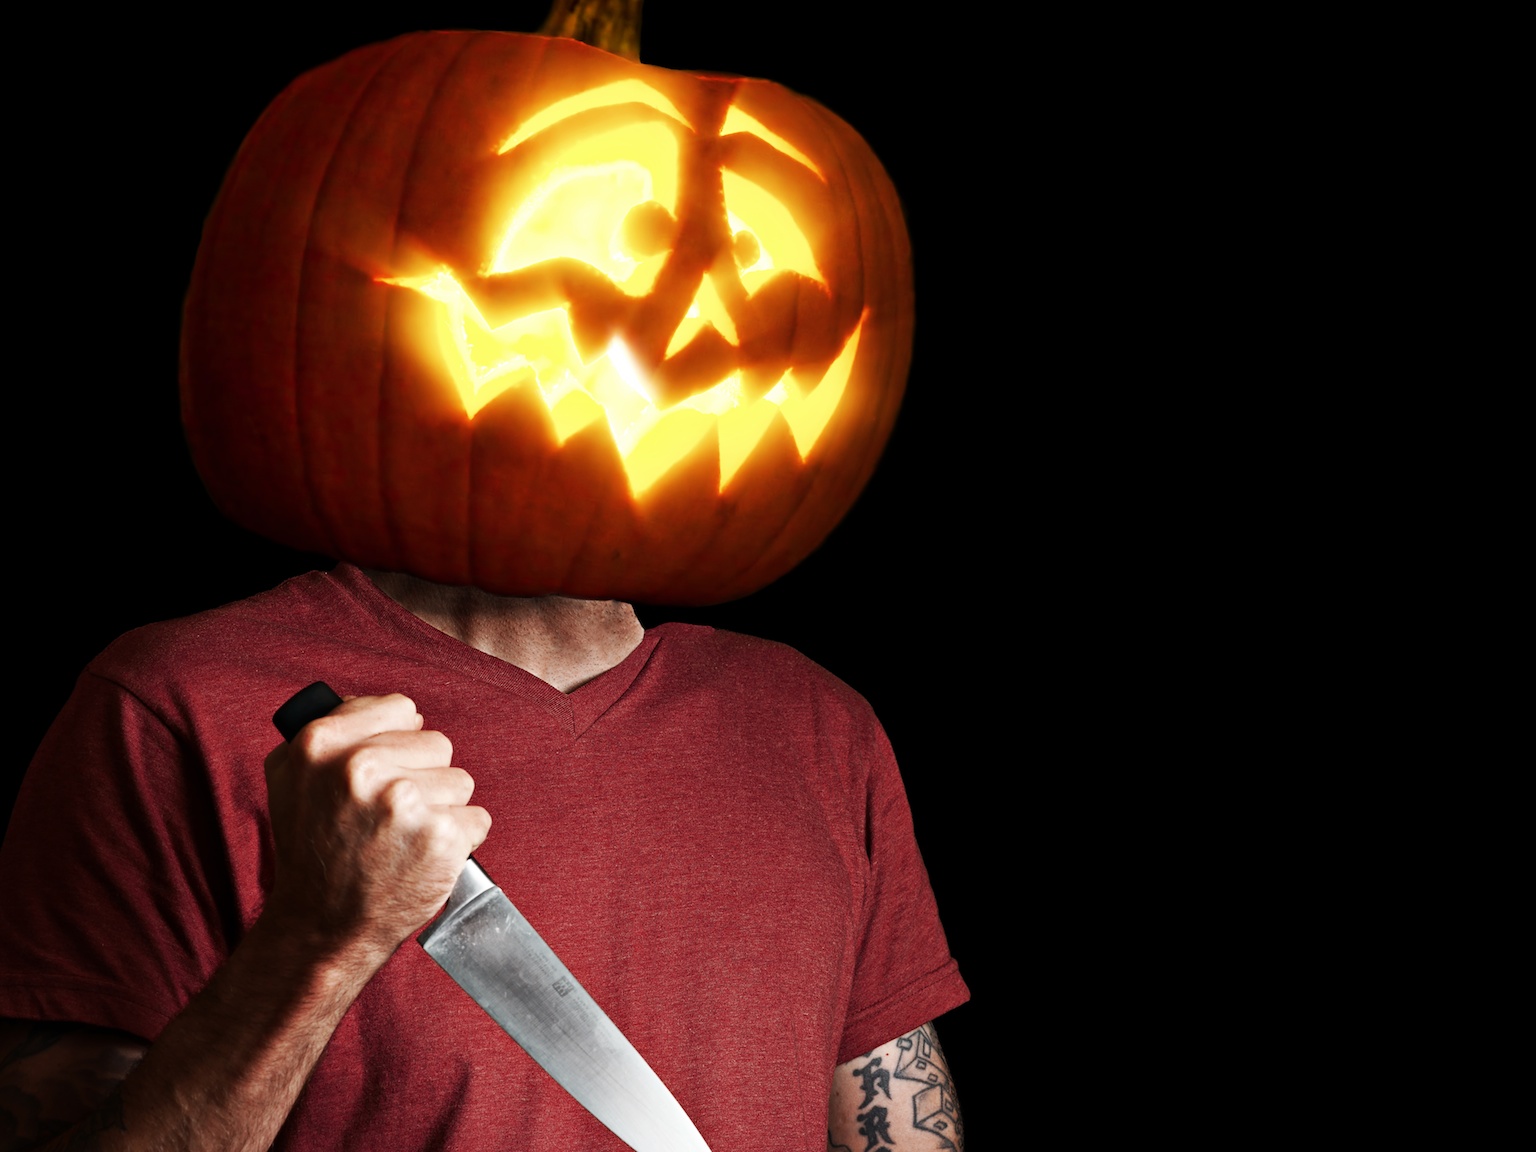
This was last year’s image. It garnered a bit of curiosity, and between it and my camera head images from the OMD vs GX7 battles, had more than a few inquiries via the contact form or email. This year, I’ve aimed for a slightly less disturbing result, but decided to carry over the theme at least, and hopefully can answer a few of the questions about how to do this yourselves, for those interested.
If you’d like to follow along, you can download full, free trials of all the plugins I’ve used here. You’re more than welcome to grab my jack o’lantern image below as well. It’s not a super large file, but to play around with, it will suffice. Grab an image of you, a friend or loved one, open both that image and the pumpkin image up in Photoshop or Photoshop Elements and follow along.

To download free trials of the Topaz Plugins, just navigate to the proper one and at the bottom of the product pages, you can click the “30 Day Trial” button. As mentioned above, Clarity is currently on sale for another 5 days, so this may be a fun way to see if it is worth while for you. I use ReMask to extract the jack o’lanterns, Clarity to increase the contrast and crisp the image up, and Exposure to add the distressed border and light leaks. ReMask is the crucial element here, but the others add some fun and flare quickly and easily. Click on the following links which will open up in a new page (so you don’t lose our fun tutorial here):
Topaz ReMask – Find the free trial here
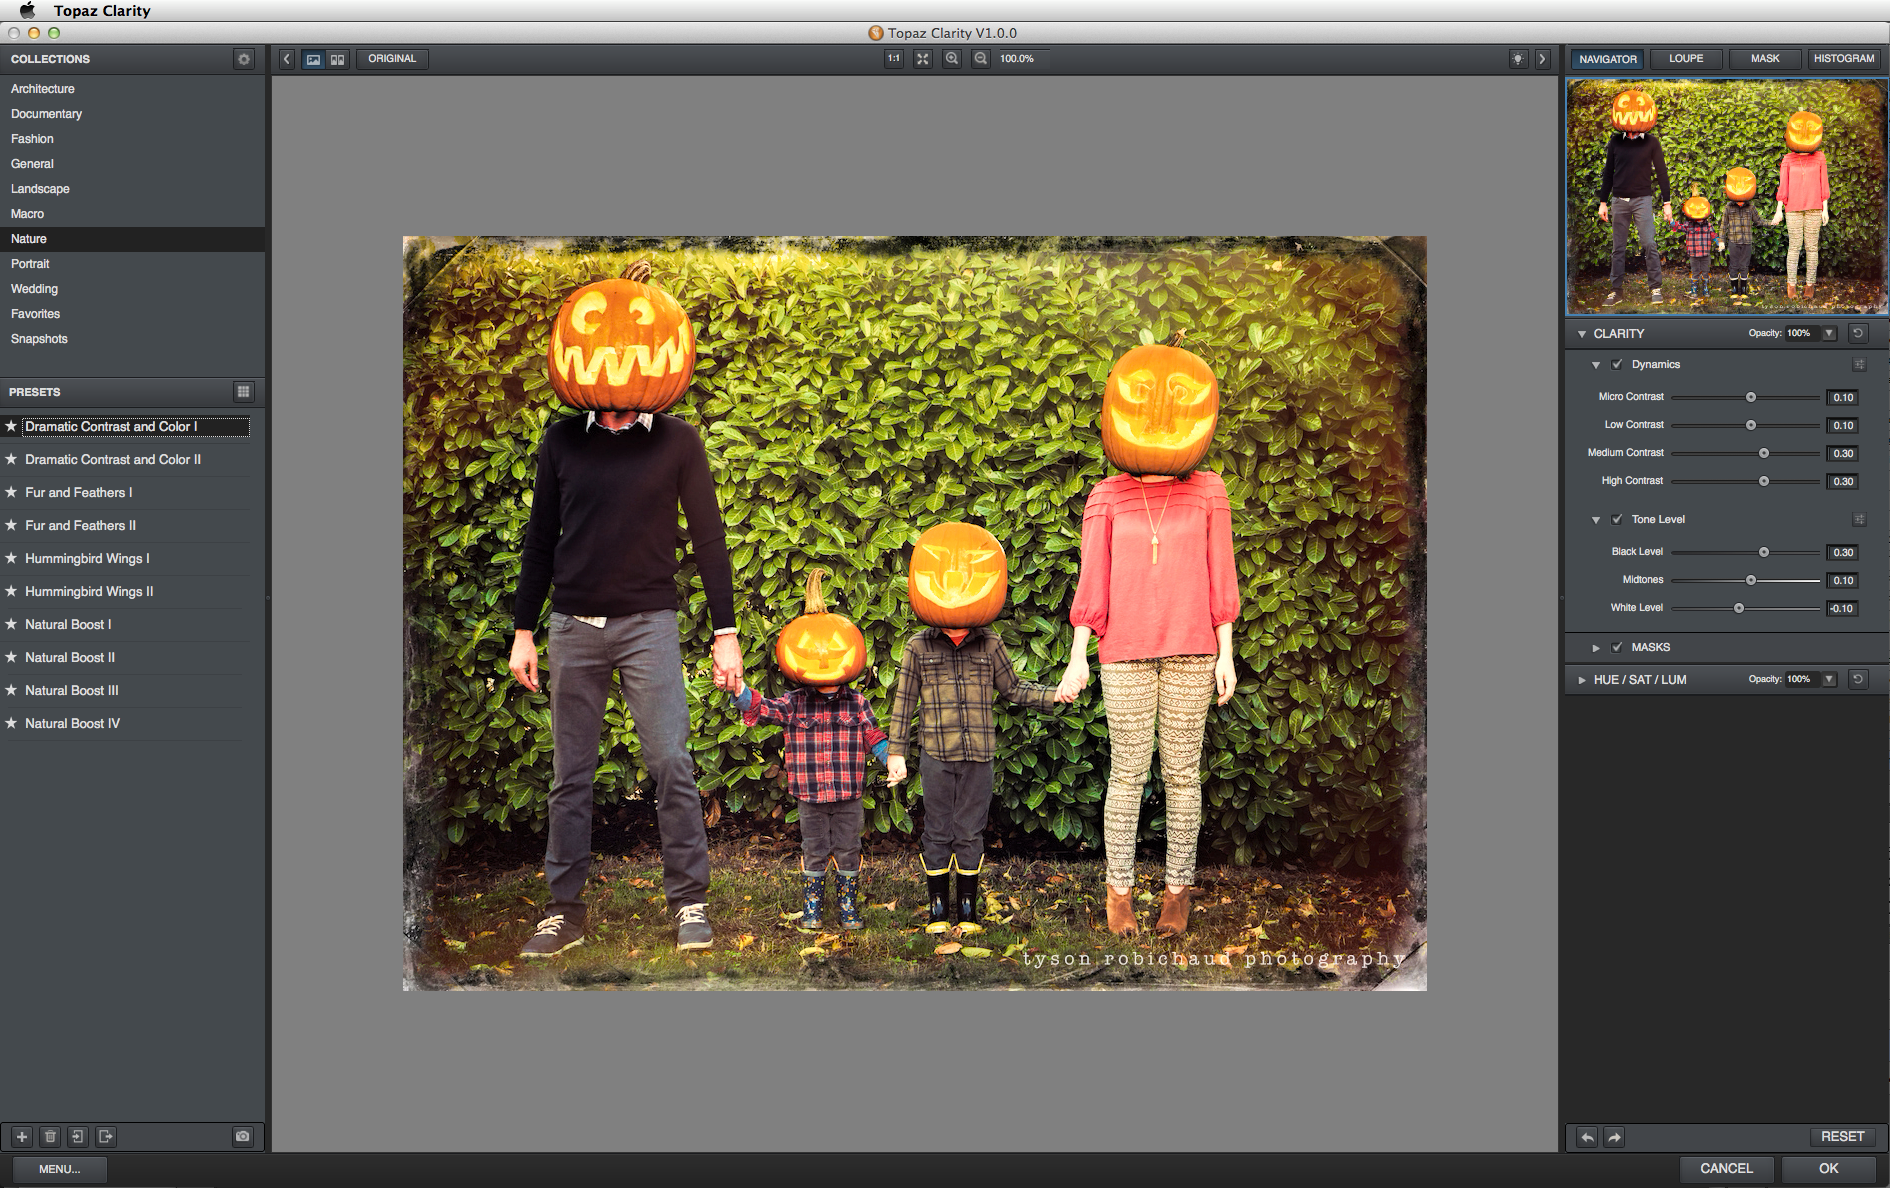
Topaz Clarity – Find the free trial here
Alien Skin Exposure 6 – Find the free trial here
I’ve used Photoshop CS6. These programs will work in PS, PS Elements, Lightroom or Aperture, but to composite, we need the ability to layer our extractions onto our background image, so you’ll need PS or Elements.
For the family shot above, I knew what I wanted to do, and set about shooting our jack o’lanterns with the intention of pulling them out using Topaz ReMask. I chose a black, solid background to help me darken the bottoms up a bit to make it look better and more realistic taking into consideration the direction of the light outside for our family shot, while making it easier to remove the gourd in ReMask.
Remask was the heavy lifter for this concept as I needed to easily extract my pumpkins and to do so, with our jo’l image open in PS or PS-Elements, simply open our jack o’lantern image up in Topaz ReMask (Filter > TopazLabs > ReMask).

When opened in ReMask, the screen should have the entire image shaded in green. Using the blue brush, outline the pumpkin, and anything else you’d like to keep. Next, select the Red Bucket and click to fill in the background as well as the little between areas near the stem and whispy bits on top (the areas we don’t want to keep). Then, click “COMPUTE MASK”
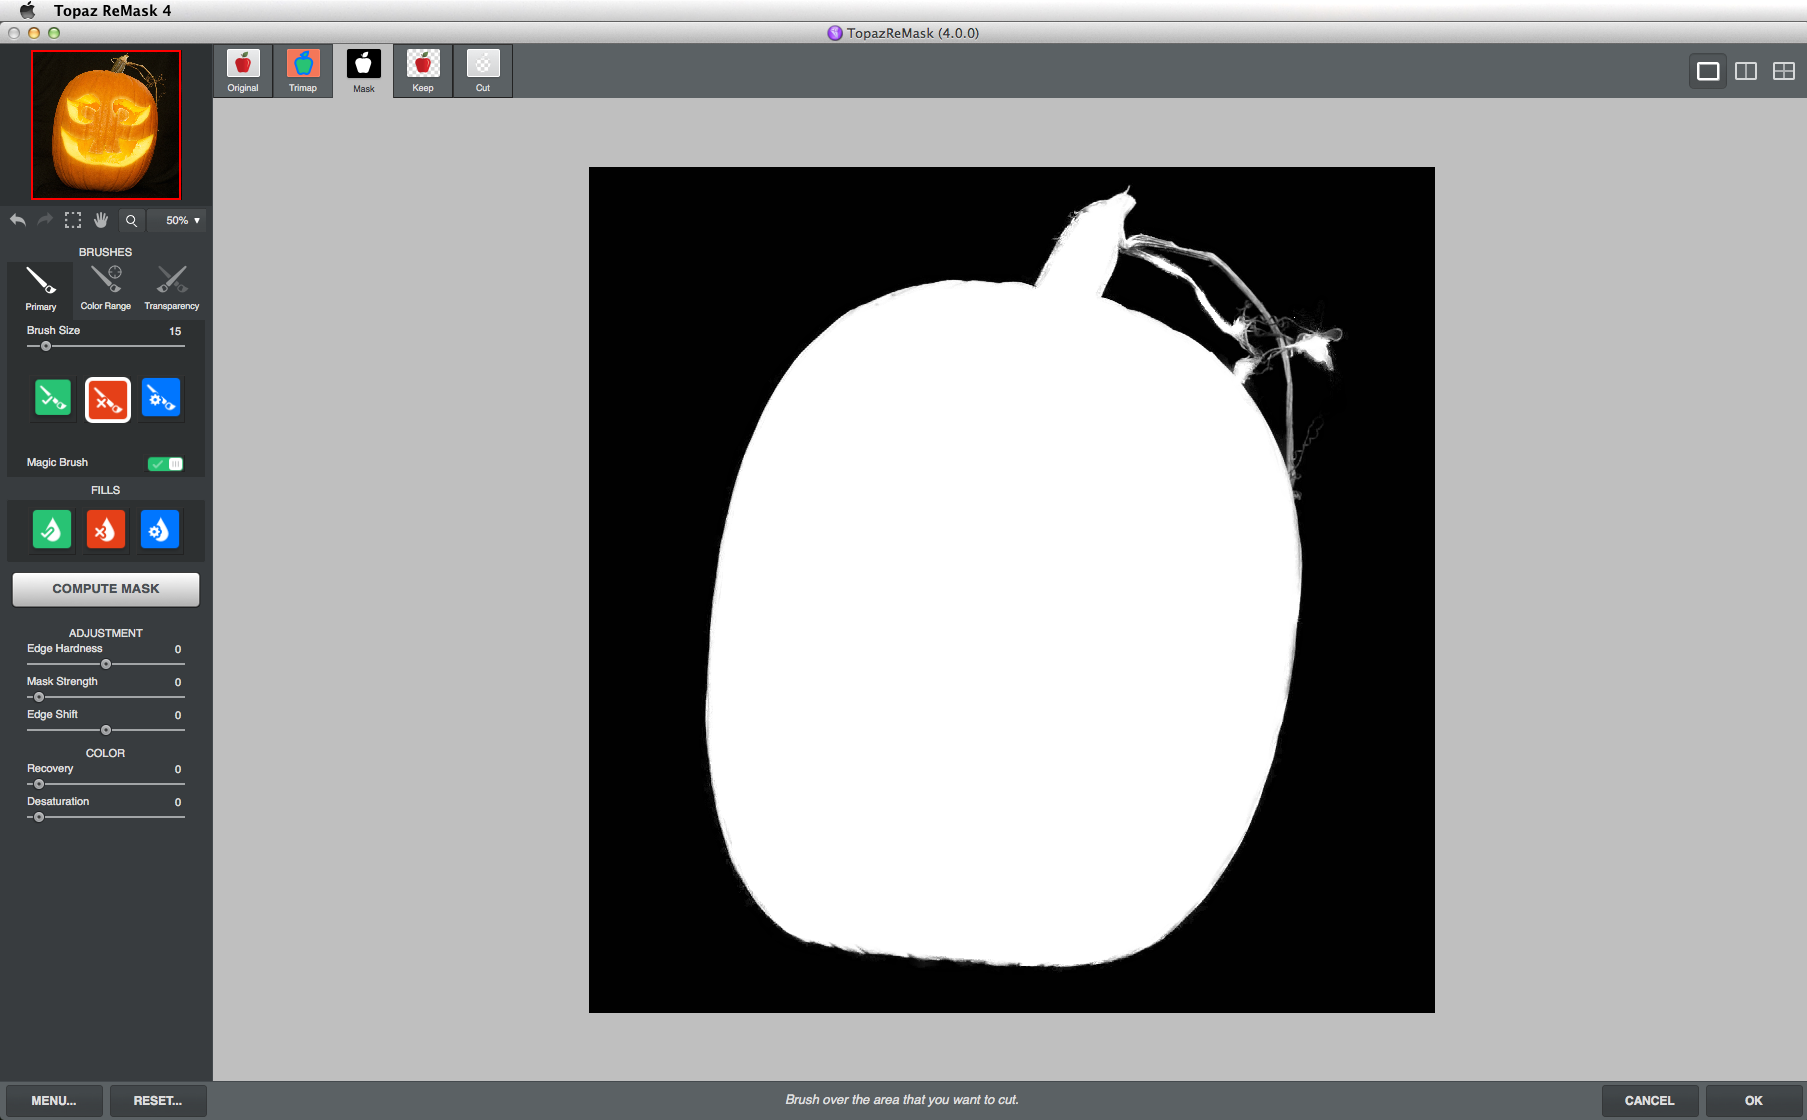
Because we use such a contrasting tone for the background, it is really easy for ReMask to create a perfect mask. If you have some sloppy edges, you can paint with the green or red brushes (in this black and white screen) over areas that you want to include (use the green brush) or any overlap that you want to remove (use the red brush) and watch the magic happen. When done, click OK at the bottom right and your magically created mask shows up on its own layer.
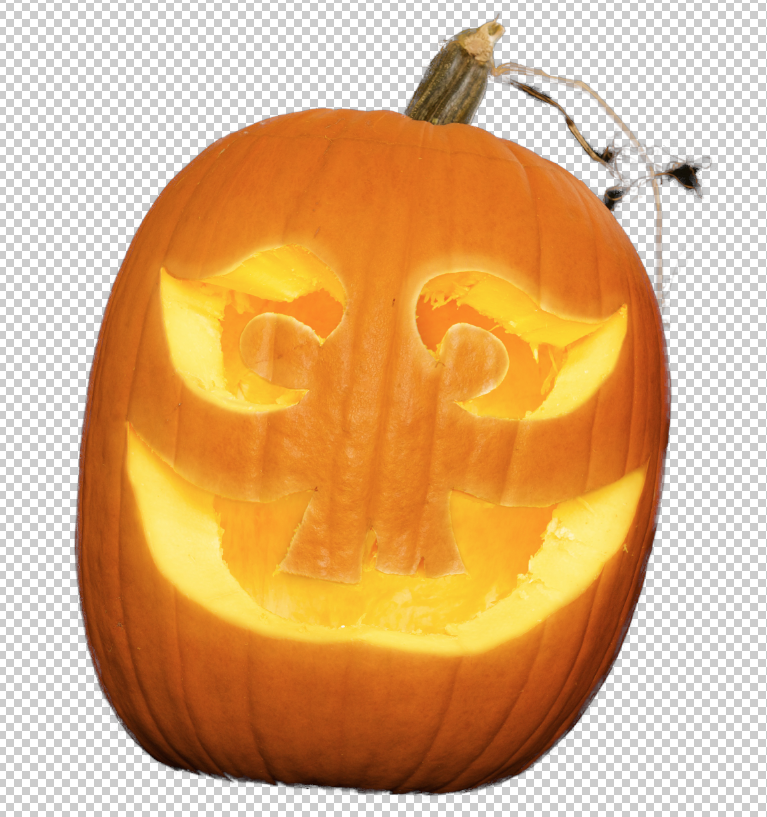
Now, simply drag this layer onto the image you want to add it to.
Depending on the size of your image, we may need to resize the jack o’lantern. Easy enough. With the jo’l layer selected, click COMMAND(CNTRL) + T which will enter the Free Transform adjustment. While holding your Shift key, grab hold of one of the corners surrounding the jo’l. Drag it to resize it (holding Shift maintains the proportions), release when you get it where you want it, and hit RETURN. Use the move tool (V) to get it into place and voila! Isn’t that easy?
Now, from here, it’s just salt and pepper. I use Topaz Clarity for probably 90% of the images I open in Photoshop because I love the simple, one click filters that add a bit of punch to any of my images. I love Alien Skin Exposure because it is both a wonderful film emulation software, but also has fun things like light leaks or borders, which seemed to suit my family image above.
Once I extracted all 4 of my jack o’lanterns, I started into the fine tuning of the overall image in Exposure, added a light leak above, and a distressed border (there are many of each to choose from).
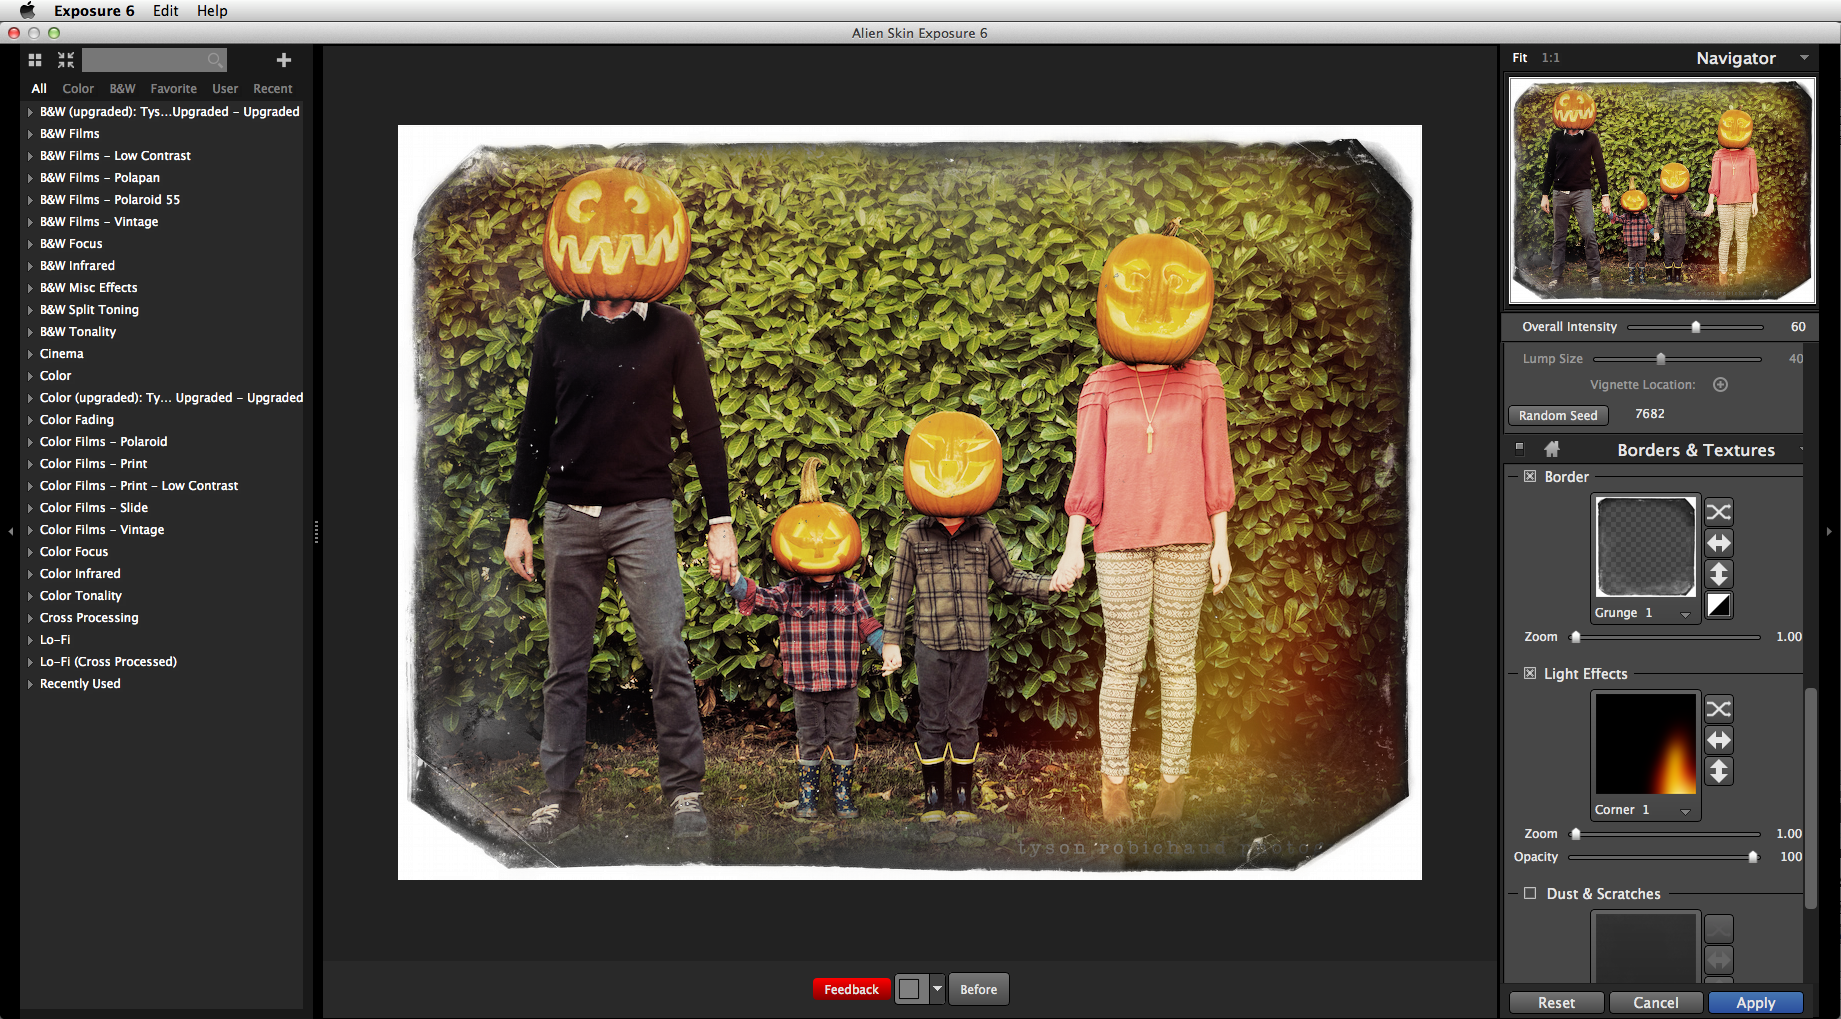
After that, a trip to Topaz Clarity to punch the image up.
That’s that folks. As mentioned Clarity is on sale HERE for the next few days. Alien Skin is currently beta testing Exposure 7, so it may be worth while holding off on buying version 6 for a couple weeks, but the free trial should get you through, and honestly, Alien Skin normally offers free upgrades to purchasers if it is within a couple months or so. ReMask is just a killer tool that I use whenever I need to composite anything in Photoshop and I’d argue that it is worth twice the price of admission in my opinion. It’s one of those tools that if you find yourself ever needing to select and extract anything ever, it pretty much pays for itself after one use. It’s awesome. I’ve written about ReMask a couple times, so if you’d like to see more, you can read up on how it revolutionized my workflow when needing to select and mask out hair HERE.
Thanks for the read guys and gals. If you have any questions, fire them off, I’d love to try and help. If you want to share your results, please do so in our Flickr Group, or with me via Facebook or Twitter. I’ve also posted our family portrait to Instagram, so you can find me there now too.
Happy Halloween everyone! Be safe, have fun and take pictures. You never know what you may want to do with them down the road.
Cheers,
Tyson

This looks great, I have a little Halloween shindig of my own this weekend and may get some good snaps to play with using techniques here. Really cool, have a great Halloween..!
LikeLike
Pingback: *Been waiting for this one. Topaz Clarity on sale! | Tyson Robichaud Photo-blography
Thanks Chris! You as well man.
LikeLike