

*Authors note: This article was written in October 2013 when Topaz were running a sale on ReMask. I’ve written an updated review and tutorial for the current sale (July 2014) which you can read and get links to the sale HERE.
(*Topaz is currently running a 50% off deal for ReMask through July 2014! Use code “julyremask” to get 50% off Click HERE for details) Topaz is offering yet another one of their awesome plugins at a steep discount through the month of October (50% off using the code “OCTREMASK” CLICK HERE). This time, it is ReMask, and I’m amazed that I have not used this plugin until now. As I’m sure anyone who uses Photoshop or Elements can attest, the task of having to select and mask strands of flyaway hair, or pull a subject from a detailed background can be a bit of a pain… Worry no more, seriously, check this out:
I have had absolutely no prior experience with ReMask before, and after having a look at a quick online tutorial, I was able to immediately come to grips with the plugin, the way it works and the ability to get killer results.
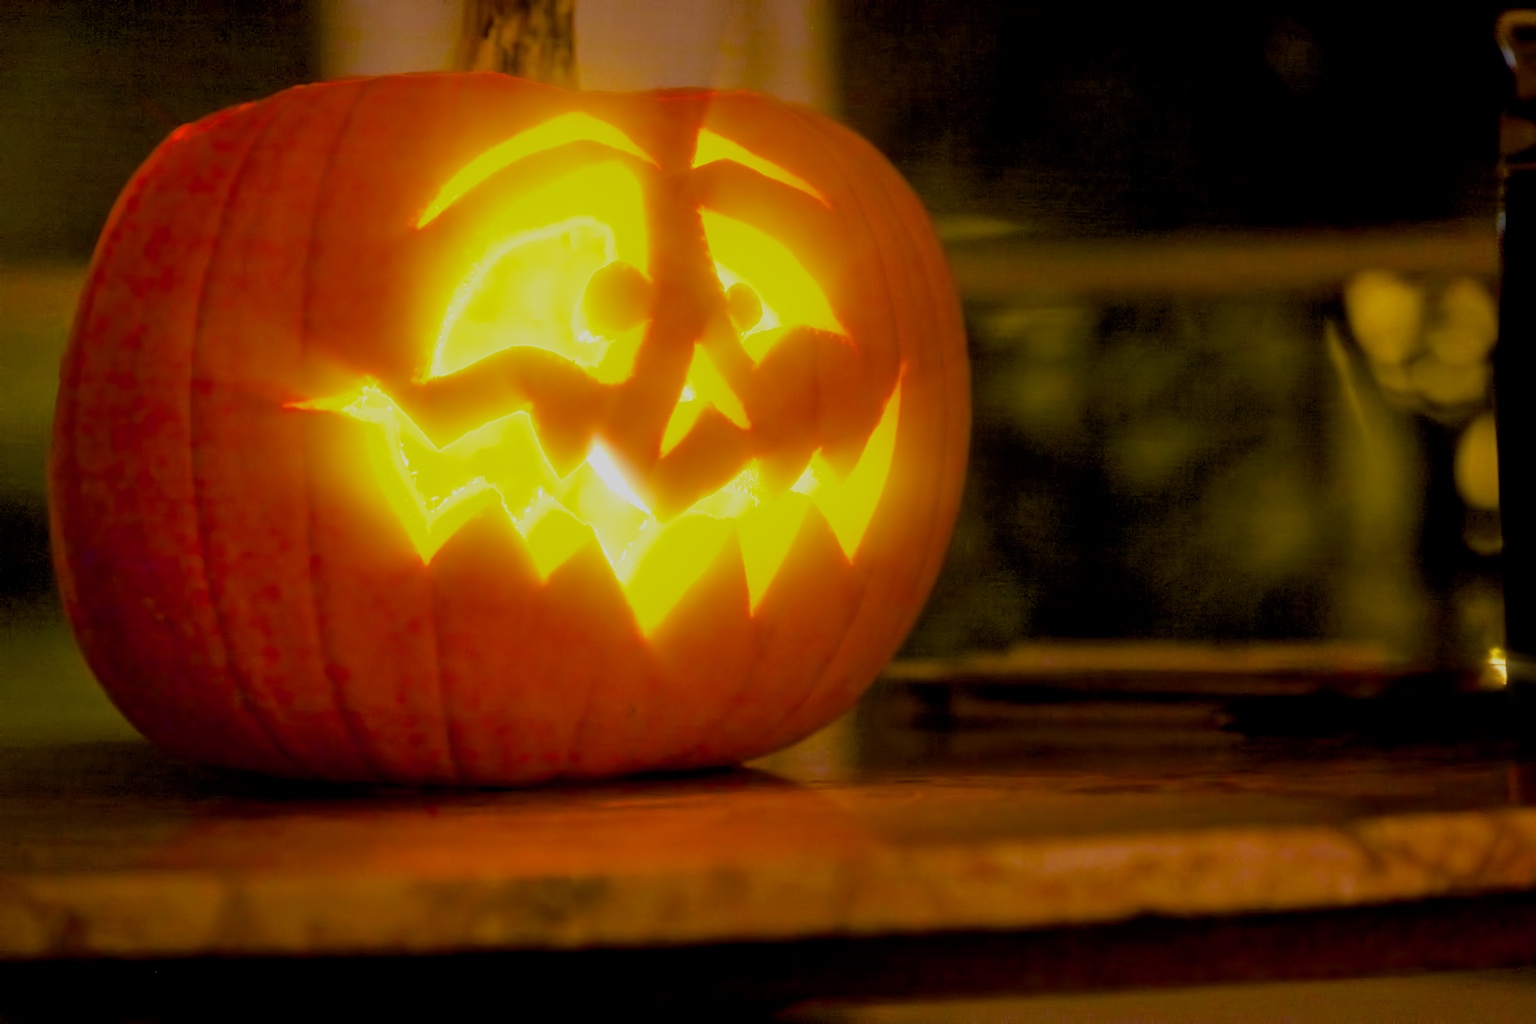
The Jack O Lantern image was easy to mask out and place on my body in place of my own head. The whole deal, with both shots being combined into one, masked together and blended took about 10 minutes. This was my very first attempt using ReMask and I only hope to get better, as it certainly can’t get much easier.
As you can see in the video below, when you open an image in Topaz ReMask, you simply paint with blue, fill the area to be masked out with red and fill the area to be kept with green.
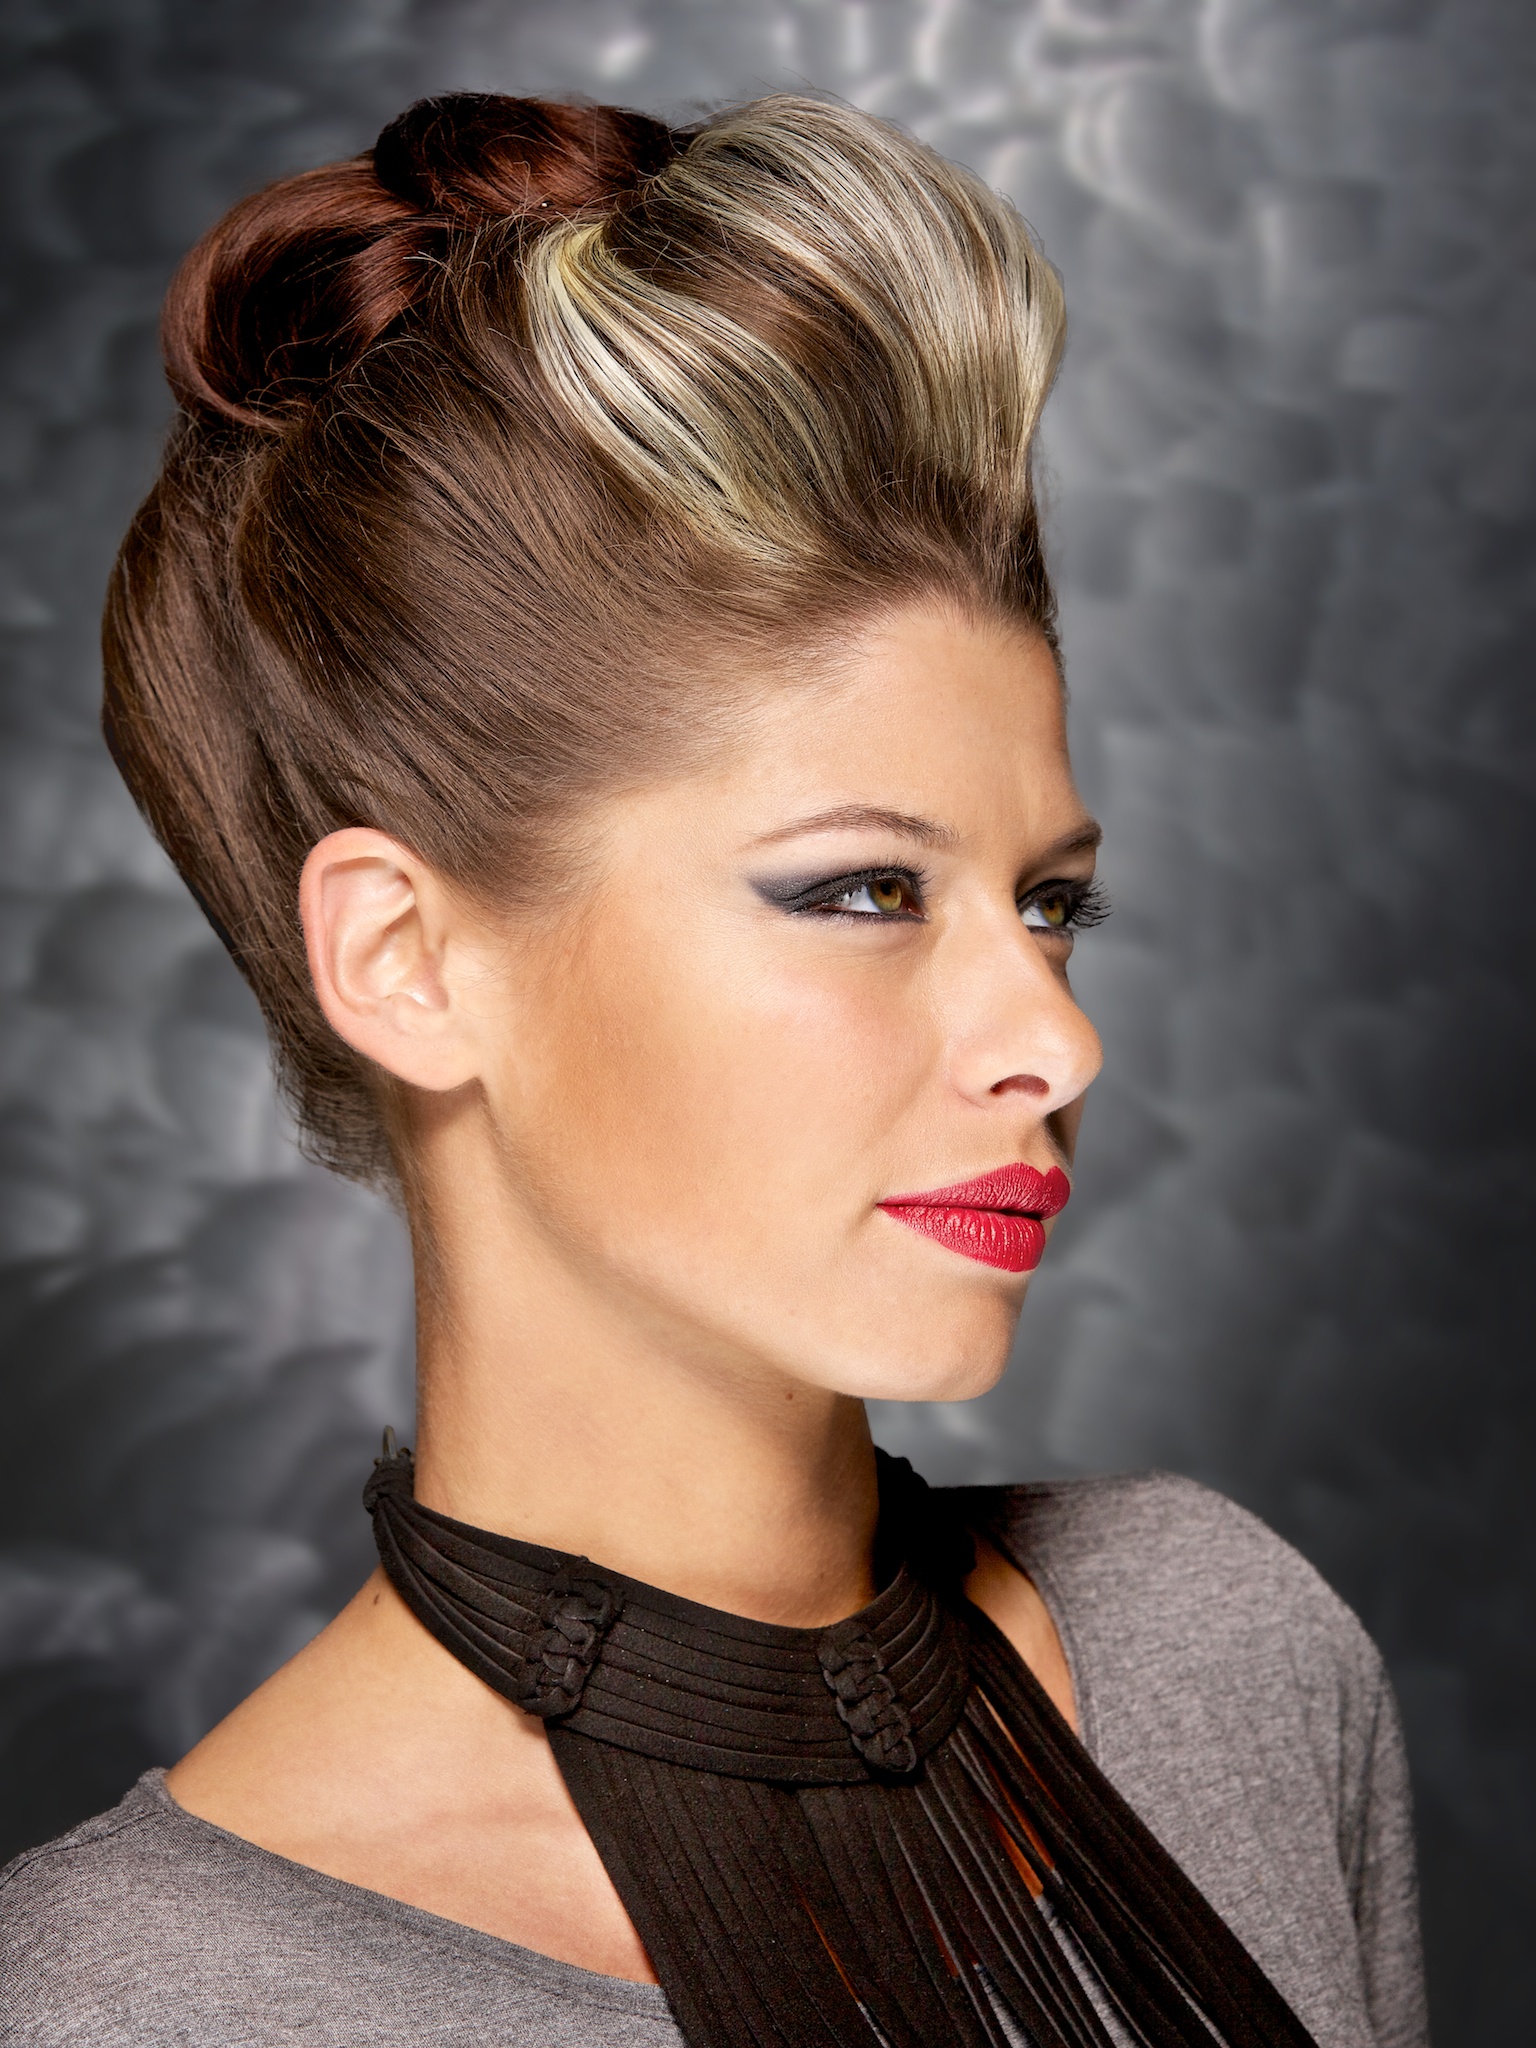
To test this out, I used an image that, while I am more or less happy with the background, it seemed a good candidate to find out how it would grab fine detail (hair, eyelashes) in a 3/4 profile shot. Here’s the original:

Here are a couple screenshots within the workspace in Topaz ReMask3. You can click on them to see a larger version.

When opened, the entire image may have a green overlay on it (or it may be red). Either way, at the top of the tool bar (on the left hand side) simply choose the blue brush, adjust to a size that fits the edge you’ll be painting over keeping in mind you can be pretty sloppy. You’ll want all the fine detail. like any flyaway hair or eyelashes, etc you’d like to keep, painted over with the blue. Then, with the green bucket on the second to bottom row, fill in the area inside your blue edge to fill it with green, if the entire image is red (remember you keep what’s green and get rid of what’s red), or conversely, if the entire overlay were green, like it was with mine, simply choose the red bucket and fill the area outside your painted edge and click “Compute Mask”
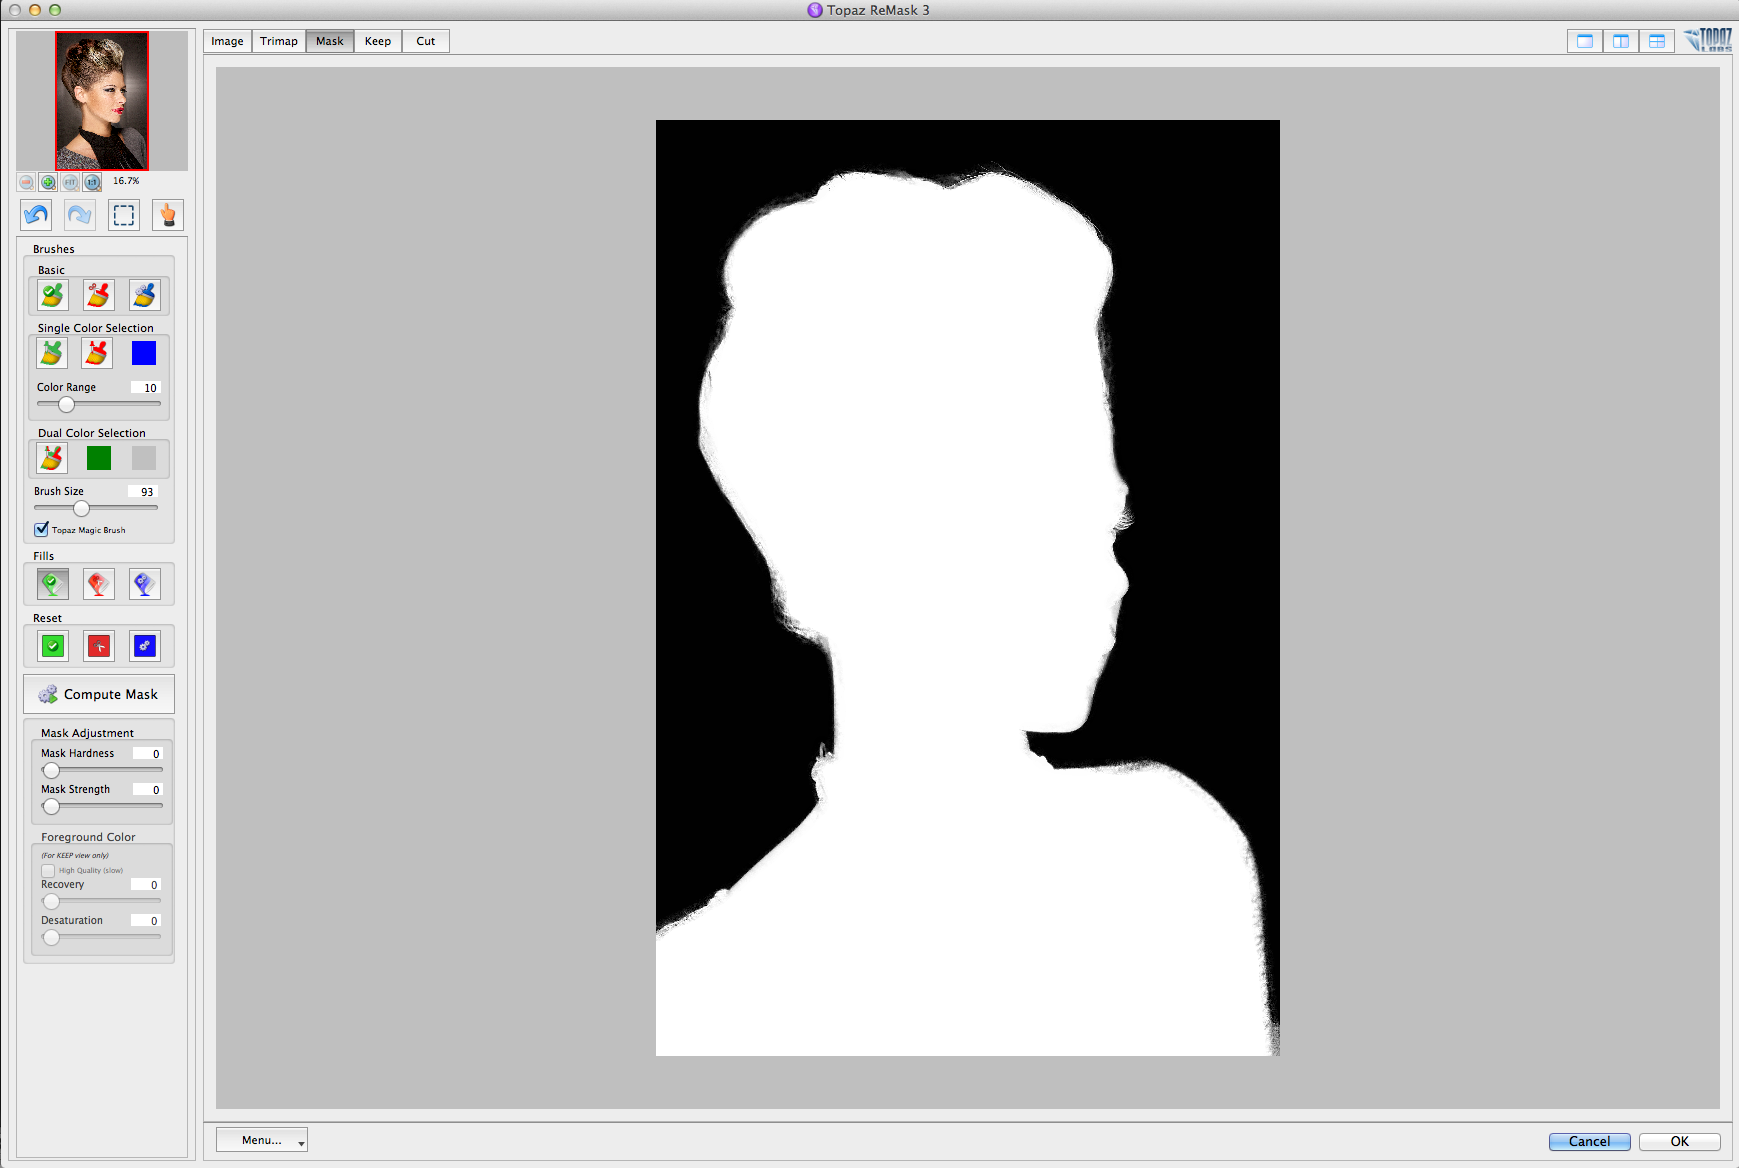
This is what comes out on the other side and you can then adjust the edge via the sliders at the bottom. Amazing. After you’re happy with the Topaz ReMask filter, click OK to bring you back to your original image with the selected mask applied to its own layer. Easy, breezy. Open whichever image you’d like to use as your backdrop, and just simply drag the new ReMask layer onto that image, if needed hit CMND(CNTRL) + T to resize, (hold onto Shift before and while you drag from one of the corners to keep the same proportions) and when done, hit Return/Enter to resize it. Here’s what took me all of about 15 seconds to finish:
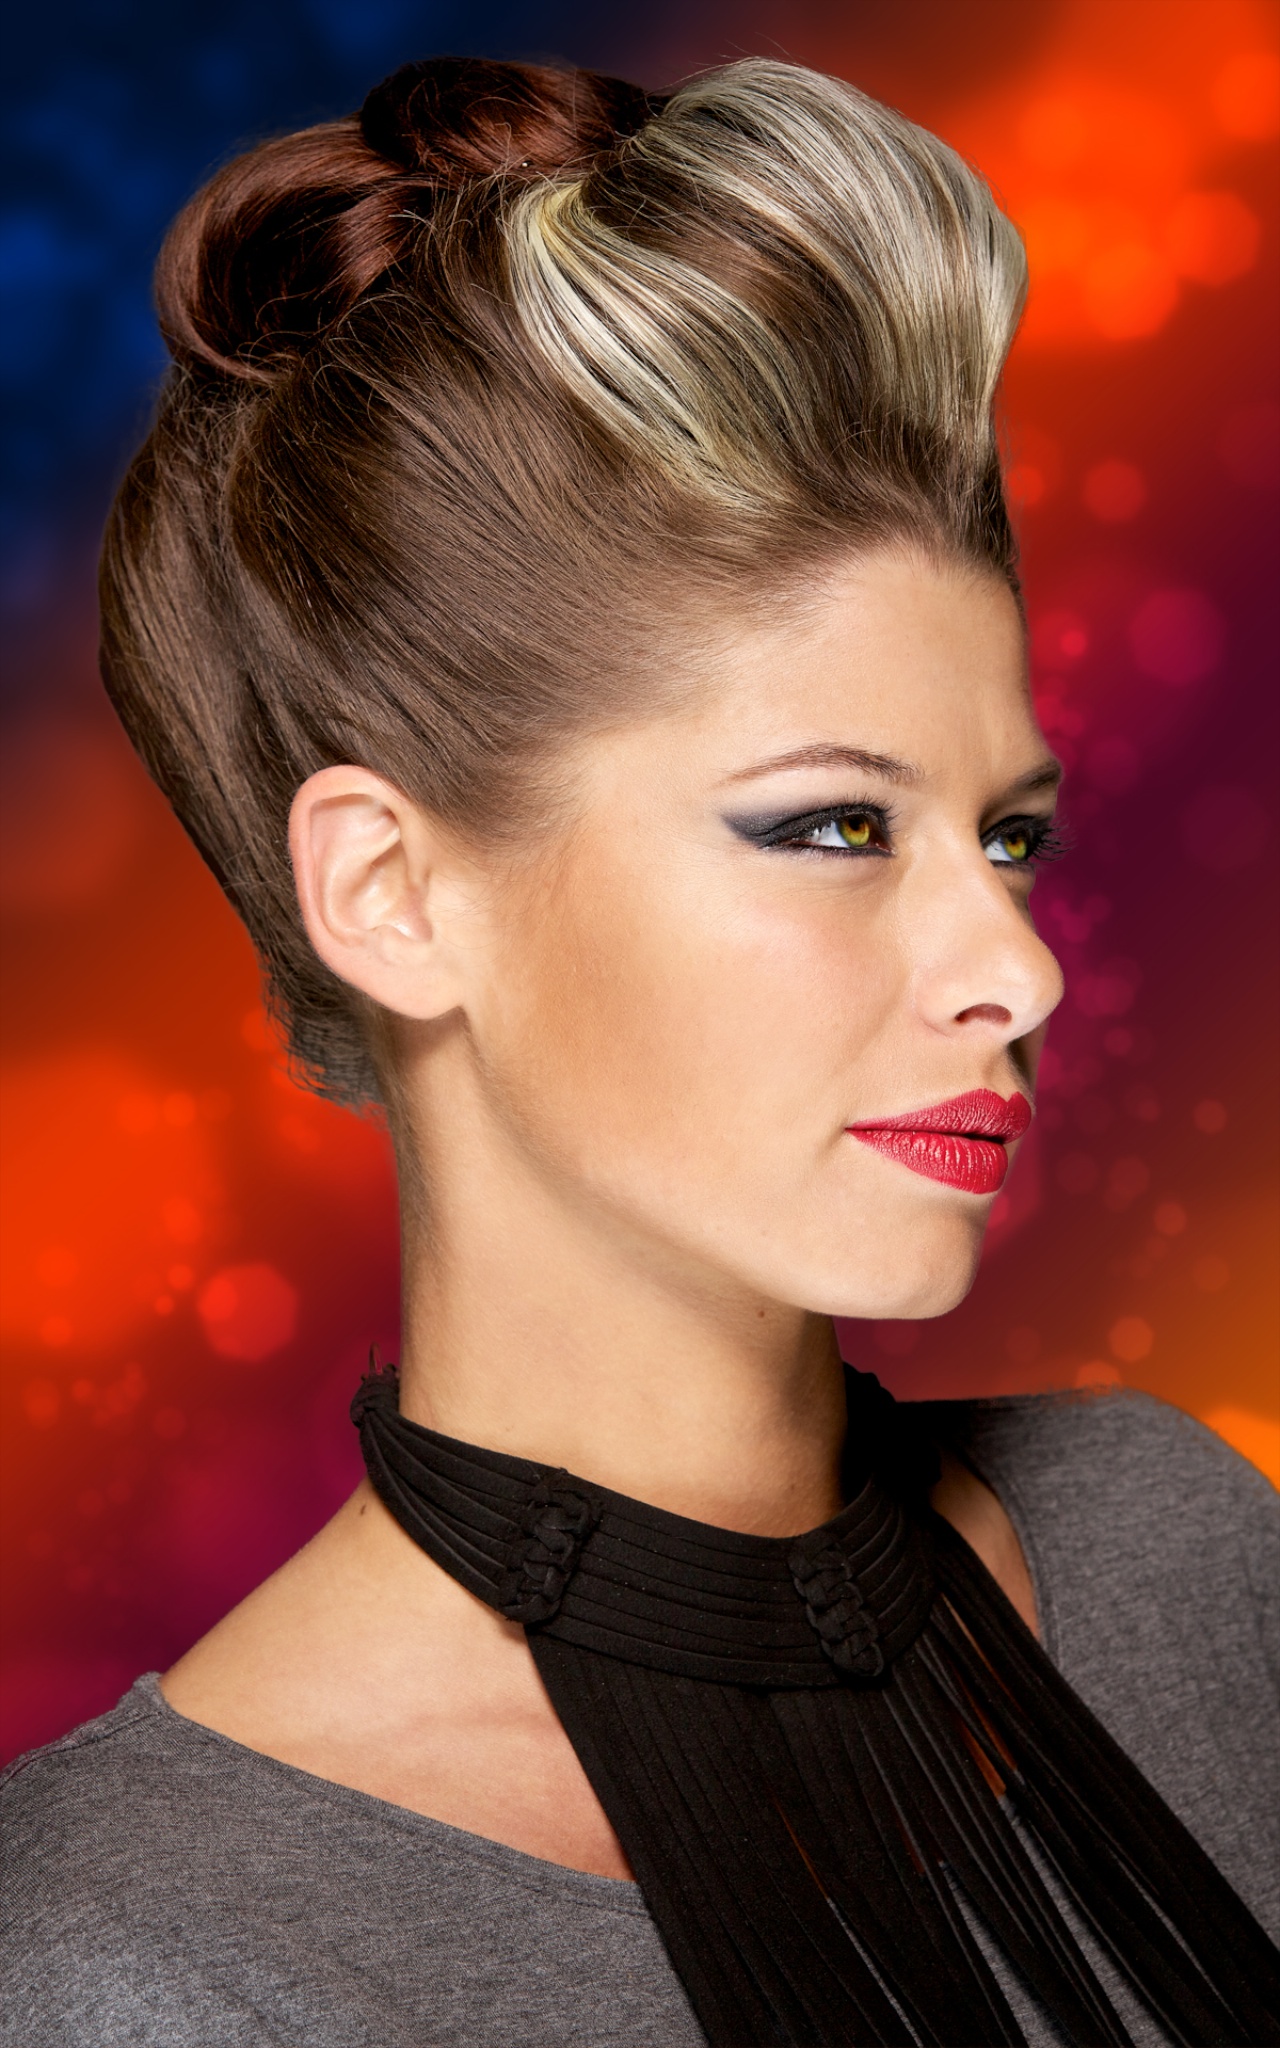
Now, I don’t know about you, but I have spent hours on single images in Photoshop trying to get a realistic selection masked. If you haven’t tried, trust me, it can be arduous to do it well. Even when using the quick selection tool in Photoshop, so often I spend a ton of time going around the edge with the lasso to fine tune my selection before adjusting the edge of that selection and under really favorable circumstances, it still takes me 10-15 minutes to mask a fairly simple subject. The above literally took me 15 seconds and without any further tweaking is as good as any manual masking I’ve personally accomplished. Seriously, I don’t know why I didn’t try this earlier. I’ve got a direct line of communication with Topaz for crying out loud! I may sound like a Topaz honk, but that is largely because I think I am. With cheap, effective plugins like this, I don’t know who wouldn’t be.
***CLICK HERE TO SEE AN UPDATED TUTORIAL (July 2014)***
Good news (for me and you) is that the whole impetus for me testing this out is that Topaz is running a sale on ReMask3 until the end of October when clicking to the Topaz Product Page HERE and using the code (current sale uses code “julyremask” through July 2014 for 50% off) “OCTREMASK” to get it at 50% off!!! What is normally a $70 plugin, you get for $34.99 through the end of October. Personally, I can’t wait to get some Halloween shots of the kids and plant them in the middle of a psych ward, or haunted backdrop…
So, if you spend any time in Photoshop or Photoshop Elements and see the benefit to instantly and accurately masking, give this a try. I think you’ll have a head/palm moment just like I have.
Any questions, fire them off in the comments. Hit me up on Facebook and Twitter as well!
Thanks for the read guys and happy shooting,
tyson

Brilliant!
LikeLike
Looks aweesome. Nice pumpkin face!
LikeLike
Thanks Chris,
Seemed to fit the season, plus I needed an example, so… 🙂
LikeLike
Sweet….I just ordered the ReMask…based on your example with the female model. Hope it does what I need… Masking takes FOREVER!!!!!
Thanks for the code!!!!!
Could have used that here bigtime!!!!
LikeLike
Hey Bob!
I don’t think you’ll be in any way disappointed. I’ve since played around further and I’m just amazed. While I’m sure there are situations which see it struggle (as would certainly be expected and should be accepted), I’ve personally not yet come across one yet. It really works some magic. I’m seriously wondering how Adobe hasn’t gobbled up the programers for some of these plugins, and honestly, at this point with the subscription move, I’m really glad they haven’t as I’ll be stuck with CS6 for the foreseeable future. I’d seen the ads in the magazines and the like, but never really gave it a try. I’m really glad that I did.
Enjoy it, and all the best,
t
LikeLike
Pingback: *Holiday Topaz Super Sale! | Tyson Robichaud Photo-blography
Pingback: *Topaz – Simplify 4, quick and easy digital painting filters with a click! | Tyson Robichaud Photo-blography
Pingback: *Topaz Detail 3, my first run | Tyson Robichaud Photo-blography
Pingback: *Helpful Topaz Workflow Suggestions | Tyson Robichaud Photo-blography
Pingback: *Topaz Clean, on sale through May | Tyson Robichaud Photo-blography
Pingback: *Topaz ReMask On Sale! If you use photoshop, you should try it, trust me. | Tyson Robichaud Photo-blography
Great information. Lucky me I discovered your
website by chance (stumbleupon). I’ve saved as a favorite
for later!
LikeLike
Awesome. Thanks Rick, I hope it helps.
Cheers,
t
LikeLike
Pingback: *Topaz ReMask4 – Free upgrade now available! | Tyson Robichaud Photo-blography