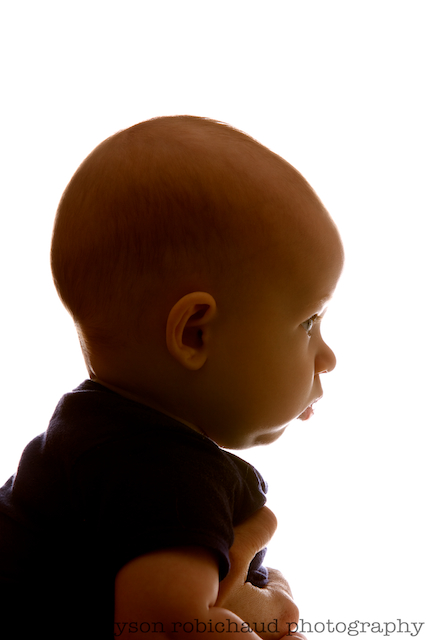
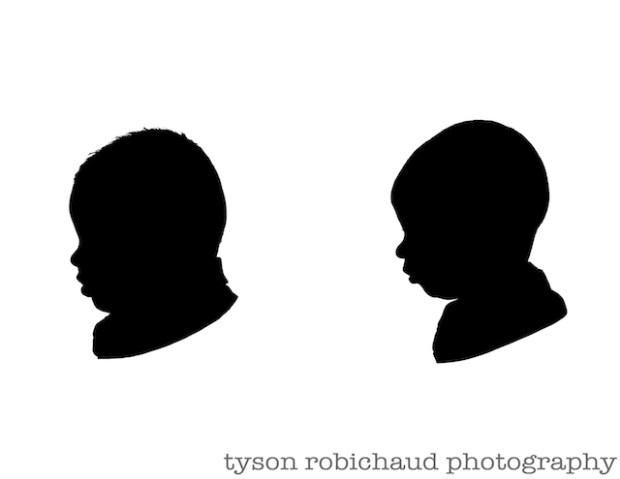
A couple years back, Mrs Squeeze had asked me if we could produce a silhouette of our new little guy (Little Baby What’s His Face, or LBWHF for short). I hadn’t done it before, but figured it would be pretty simple and we’ve enjoyed it so much, we just did one for our new little guy (The Amazing Pantso, or just Pansto for short). We shot each of their silhouettes at almost the exact same age (just about 5 months) and it is really cool to see just how different they are, well, how different their physical profiles are anyway. Read on for a step by step on how to accomplish this…
The trick here is contrast. To achieve it the way I’ve done it, you’ll need some type of layer based editing program like Photoshop, Photoshop Elements, GIMP, etc. We want to produce a back light which will naturally create a bit of a silhouette to begin with. I’ve used a softbox, but any diffused, strong light source should work. If you don’t have a softbox, try hanging a white bed sheet and placing as much light behind it as you need to get it to go totally white, or even place your subject in front of a bright window (over expose as far as you need to, just watch the little details like hair, eyelashes, etc). Here’s how I shot both of our boys:
SHOOTING:
- With mom holding each of our proverbial, joyful bundles, we did our best to get their attention by way of blinkie, loud (generally obnoxious) kids toys we’d received from friends and family members who’d obviously never had a kid of their own. If you’re shooting someone older, normally vocal direction should work just fine.
- Next, with a predetermined exposure, we just fired away. Based on your exposure, you should try to get enough overexposure to get the background to go completely white, but not so much that you start to lose details in your subject with that light bleaching out the outline itself. Look at your shots on the LCD screen to determine if you’re getting too much light. If you start to see the bright highlights overpower the edge of your subject, you’ve gone too far.
- You want just enough light to be able to entirely separate your subject from the background.
PROCESSING:
- Once you have gotten your shot, get them into your software program of choice and start by increasing the contrast. Again, keep an eye on the edge/outline of your subject. You’ll want the white background to be as congruous as possible for the next step. Here you want to darken your subject and brighten the background.
- With the image contrast dialed up, in your layer based image editing program (Photoshop, et al) copy your background layer.
- Next, on your copied layer, select the white background area surrounding your subject. (I use Photoshop, so these directions will be outlined as such) With the magic wand (or your selection tool of choice) select the white background keeping a close eye on the outline of your subject. If you’ve avoided any light bleeding onto the subject’s edge, this should be pretty quick and easy. Keep in mind any of the white background showing through hair, etc, that isn’t selected will end up becoming part of your silhouette’s profile, so select anything you want to stay white.
- (this may seem backwards, but follow me here) When you’re happy with your selection, press SHIFT + COMMAND (CNTRL on PC) + “I” to invert the selection which will select your subject.
- Then, go to EDIT > FILL and select whichever color you’d like the subject to be. I chose black.
- Next, with the subject taken care of, you can then harmonize the background if you’d like. The easiest way I’ve found is to select the now solidly colored silhouette and use the “SHIFT + CMND + I” method to wholly select the background and then go to EDIT > FILL and use white (or whichever color you want).
- The reason I like to do it this way as opposed to doing the background when we originally have it selected is to make sure I’ve got my subject taken care of first. It will work just as well if you’d like to white out the background first, then select it and invert it so that your subject is selected, THEN fill it with whichever color you’d like for the subject itself. Either way, it’s two different routes to the same destination.
- After you’ve created your throwback digital cameo, find a cool paper or printable canvas to print it on (you do print your pictures, right?) and go to town. I really like canvas or a textured, watercolor (art rag, cotton rag, et al) type paper as the texture really adds to this type of monochromatic statement piece. Frame it up and impress your significant other, friend, family member or whathaveyou. Makes for a wonderful holiday or birthday gift for grandparents (or if you’re a grandparent, for your own kids) and it’s a fun way to freeze a uniquely depicted moment in anyone’s personal history.
Thanks for the read and happy shooting,
Tyson


Neat picture! Thanks for the technique.
LikeLike
No problem Terry 🙂
cheers
LikeLike
Pingback: *Keep calm and take pictures. Covid Creatives Collective, Project 1 – one light | Tyson Robichaud Photo-blography